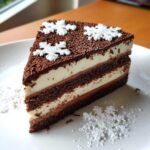
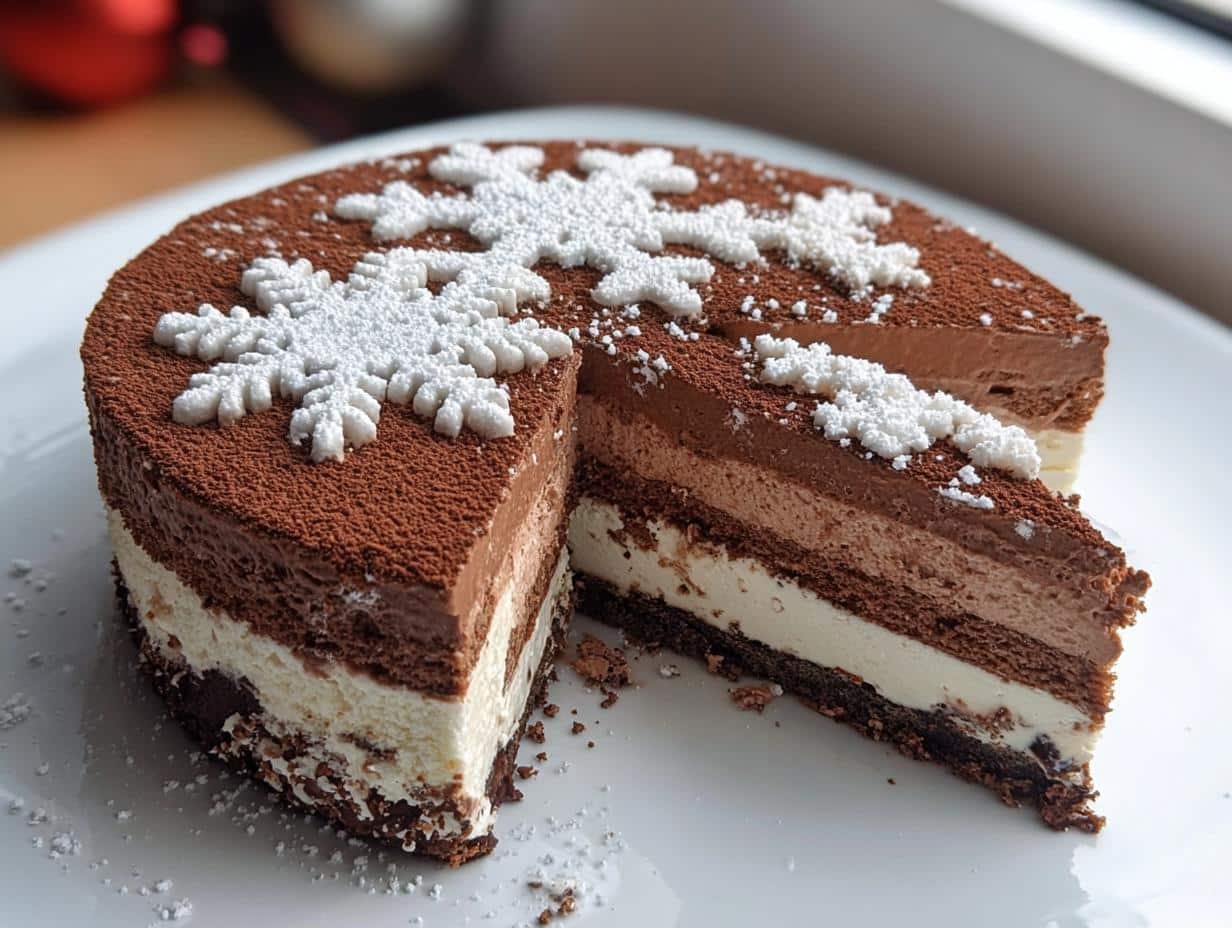
I’ll never forget the first time I made this Chocolate Snowflake Cake. It was one of those perfect Vermont winter mornings where fat snowflakes drifted past my kitchen window, and I wanted to bake something that captured that magical feeling. This cake was my answer—rich chocolate layers with clouds of velvety mousse, all dusted with delicate powdered sugar snowflakes. What surprised me most was how simple it came together! No fancy techniques, just good ingredients and a little patience while the mousse set. Now it’s become my go-to holiday dessert—impressive enough for Christmas dinner but cozy enough to enjoy with hot cocoa by the fire.
Why You’ll Love This Chocolate Snowflake Cake
This cake holds a special place in my holiday baking tradition because it’s got that perfect mix of “wow factor” and approachability. Here’s why I think you’ll adore it as much as I do:
- Effortless elegance: That snowy powdered sugar design looks straight from a fancy bakery, but all you need is a simple stencil from the craft store (or even a paper snowflake cutout!).
- Festive versatility: It’s equally at home at Christmas dinner or your neighborhood cookie exchange party. I’ve made it for both and gotten rave reviews each time.
- Rich yet balanced: The dark chocolate cake layers paired with airy mousse create this heavenly contrast – indulgent but never overwhelming.
- Make-ahead magic: The flavors deepen when chilled overnight, meaning less stress on party day. The mousse layers also hold up beautifully in the fridge for 2-3 days!
P.S. If you’re craving more winter flavors, try pairing it with my chocolate peppermint bread for a delightful dessert spread!
Ingredients for Chocolate Snowflake Cake
Gathering the right ingredients makes all the difference with this cake – it’s where the magic starts! I’ve learned through trial and error that quality matters here, especially with the chocolate. Below, you’ll find everything sorted by component so you can prep efficiently. And yes, I’ve included my favorite substitutions too!
For the Cake
Dry Ingredients:
- 2/3 cup all-purpose flour (spooned and leveled)
- 1/4 cup cocoa powder, sifted (I like Dutch-process for richer flavor)
- 2/3 cup granulated sugar
- 3/4 teaspoon baking soda
- 3/4 teaspoon baking powder
- 1/4 teaspoon fine sea salt
Wet Ingredients:
- 1 large egg (let it sit out 30 minutes – room temp blends better!)
- 1/4 cup whole milk (or almond milk for dairy-free)
- 3 tablespoons vegetable oil
- 1/2 teaspoon pure vanilla extract
- 1/4 cup hot water
For the Mousses
Milk Chocolate Mousse:
- 4 3/4 oz good quality milk chocolate (I swear by Ghirardelli or Callebaut)
- 7.5 fl oz cold whipping cream
- 3 large egg whites
- 2.5 fl oz whole milk
- 3/16 oz powdered gelatin
- 1 1/2 tablespoons cool water
White Chocolate Mousse:
- 4 3/4 oz premium white chocolate (not chips – they contain stabilizers)
- Same proportions as above for cream, egg whites, milk, gelatin
Pro Tip: Always bloom gelatin by sprinkling over cold water first – no clumps means silky smooth mousse!
How to Make Chocolate Snowflake Cake
Okay, let’s dive into the fun part—bringing this winter wonderland to life! I’ll walk you through each step just like I do with my baking students, sharing all the little tricks I’ve picked up over the years. Trust me, the process is easier than you think, and the “wow” factor is totally worth it. Just take your time, enjoy the process, and don’t stress if things aren’t perfect—that’s part of the charm!
Baking the Chocolate Cake
First things first—preheat that oven to 350°F and grease your cake pan really well (I like to use butter and a dusting of cocoa powder so you don’t get white flour spots). Now, whisk all your dry ingredients together in one bowl—flour, cocoa powder, sugar, baking soda, baking powder, and salt. In another bowl, whisk the wet ingredients—egg, milk, oil, and vanilla. Here’s my secret: slowly stream the hot water into the wet mix while whisking to temper the eggs. Then, gently fold the wet into the dry—just until combined! Overmixing makes tough cake. Pour into your pan and bake 25-30 minutes until a toothpick comes out with moist crumbs (not wet batter). Let it cool completely—I know, the waiting is hard!
Preparing the Mousse Layers
While the cake cools, let’s make those dreamy mousse layers. Start by blooming your gelatin—sprinkle it over cool water and let it sit (it’ll look like applesauce when ready). Melt your chocolates separately—I do this in 20-second microwave bursts, stirring between each. Now, whip the cream to soft peaks—don’t overdo it! For the milk chocolate mousse, gently heat the milk, then whisk in the bloomed gelatin until dissolved. Stir this into the melted milk chocolate, then fold in the whipped cream. Repeat with white chocolate. Here’s the key: chill each mousse for 20 minutes before layering—it’ll hold its shape better. If you rush this, you’ll get a delicious but messy cake (been there!).
Assembling the Chocolate Snowflake Cake
Time for the grand finale! Slice your cooled cake horizontally into two even layers—a serrated knife works best. Place the bottom layer on your serving plate and spread with milk chocolate mousse. Top with the second cake layer, then spread white chocolate mousse over everything. Chill for at least 2 hours (overnight is ideal). When ready to serve, place a snowflake stencil on top and dust generously with powdered sugar. Gently lift the stencil—voilà! Instant winter magic. For extra flair, try my KitKat cake decorating technique with chocolate shards around the edges!

Tips for Perfect Chocolate Snowflake Cake
After making this cake more times than I can count (and yes, learning from a few messy mistakes!), here are my foolproof tips to ensure yours turns out stunning every time:
- Chill like you mean it: Let each mousse layer set for at least 20 minutes before assembling. I know it’s tempting to rush, but this prevents the layers from sliding into each other. For best results, I often prep the mousses the night before.
- Stencil magic: Use a plastic stencil from the craft store – they’re sturdier than paper. Hold it about an inch above the cake when dusting with powdered sugar for the crispest snowflakes. Tap the sieve lightly – less is more at first!
- Temperature matters: Room-temperature eggs blend smoother into the cake batter, and cold cream whips up fluffier for the mousse. Take ingredients out about 30 minutes before starting.
- Storage savvy: Keep leftovers (if you have any!) covered in the fridge for up to 3 days. The mousse stays perfect, though the snowflake design might need a quick refresh before serving again.
- Bonus pro move: For extra elegance, pipe rosettes of leftover mousse around the base like little snowdrifts. It hides any imperfect edges and makes it look straight from a patisserie! If you love chocolate desserts, try this trick with my chocolate raspberry cheesecake too.
FAQs About Chocolate Snowflake Cake
Over the years, I’ve gotten so many great questions about this festive cake! Here are the ones that pop up most often with my tried-and-true answers:
Can I make Chocolate Snowflake Cake ahead for Christmas?
Absolutely! In fact, I recommend it. The flavors blend beautifully when made 1-2 days in advance. Just hold off on the powdered sugar snowflakes until a few hours before serving so they stay crisp. Wrap the chilled cake in plastic to keep the mousse fresh.
What can I use instead of gelatin in the mousse?
For a vegetarian option, agar agar works well—use about 1 teaspoon per mousse layer. You could also try cornstarch (mix 1 tablespoon with cold milk before heating), though the texture will be slightly denser. Both work great for holiday baking when gelatin isn’t an option.
How should I store leftovers?
Keep any remaining slices in an airtight container in the fridge for up to 3 days. The mousse holds up surprisingly well! If the snowflake design fades, just re-dust with powdered sugar before serving—an easy Christmas dessert refresh.
Can I freeze this cake?
You can freeze the baked cake layers for up to a month, but I don’t recommend freezing the assembled dessert. The mousse tends to separate when thawed. Better to enjoy as a make-ahead holiday treat stored in the fridge!
Nutritional Information
Just a quick note—these nutritional values are estimates based on standard ingredients. Your exact numbers might vary slightly depending on brands and precise measurements. Here’s the breakdown per generous slice of Chocolate Snowflake Cake:
- Calories: 350
- Fat: 20g (10g saturated)
- Carbohydrates: 40g
- Fiber: 2g
- Sugar: 25g
- Protein: 6g
Remember, holiday desserts are about joy first—so savor every snowy bite without stressing the numbers too much!
Print
Chocolate Snowflake Cake
- Total Time: 60 min
- Yield: 8 servings 1x
- Diet: Vegetarian
Description
A festive winter-themed cake with layers of chocolate cake and mousse, topped with powdered sugar snowflakes.
Ingredients
- 2/3 cup all-purpose flour
- 1/4 cup cocoa powder
- 2/3 cup sugar
- 3/4 teaspoon baking soda
- 3/4 teaspoon baking powder
- 1/4 teaspoon salt
- 1 large egg
- 1/4 cup milk
- 3 tablespoons oil
- 1/2 teaspoon vanilla extract
- 1/4 cup water
- 7 1/2 fluid ounces whipping cream
- 4 3/4 ounces good quality milk chocolate
- 3 large egg whites
- 2 1/2 fluid ounces milk
- 3/16 ounce powdered gelatin
- 1 1/2 tablespoons water
- 7 1/2 fluid ounces whipping cream
- 4 3/4 ounces good quality white chocolate
- 3 large egg whites
- 2 1/2 fluid ounces milk
- 3/16 ounce powdered gelatin
- 1 1/2 tablespoons water
Instructions
- Preheat oven to 350°F. Grease and flour a cake pan.
- Mix flour, cocoa powder, sugar, baking soda, baking powder, and salt in a bowl.
- Add egg, milk, oil, vanilla, and water. Stir until smooth.
- Pour batter into the pan and bake for 25-30 minutes. Let cool.
- For milk chocolate mousse, melt chocolate and mix with whipping cream, egg whites, milk, gelatin, and water. Chill until set.
- For white chocolate mousse, repeat the same steps with white chocolate.
- Layer cake with mousse and dust with powdered sugar snowflakes.
Notes
- Use a stencil for the snowflake design.
- Chill mousse before layering for best results.
- Prep Time: 30 min
- Cook Time: 30 min
- Category: Dessert
- Method: Baking
- Cuisine: American
Nutrition
- Serving Size: 1 slice
- Calories: 350
- Sugar: 25g
- Sodium: 200mg
- Fat: 20g
- Saturated Fat: 10g
- Unsaturated Fat: 8g
- Trans Fat: 0g
- Carbohydrates: 40g
- Fiber: 2g
- Protein: 6g
- Cholesterol: 50mg
Keywords: chocolate cake, holiday baking, Christmas dessert, winter cake, snowflake cake

