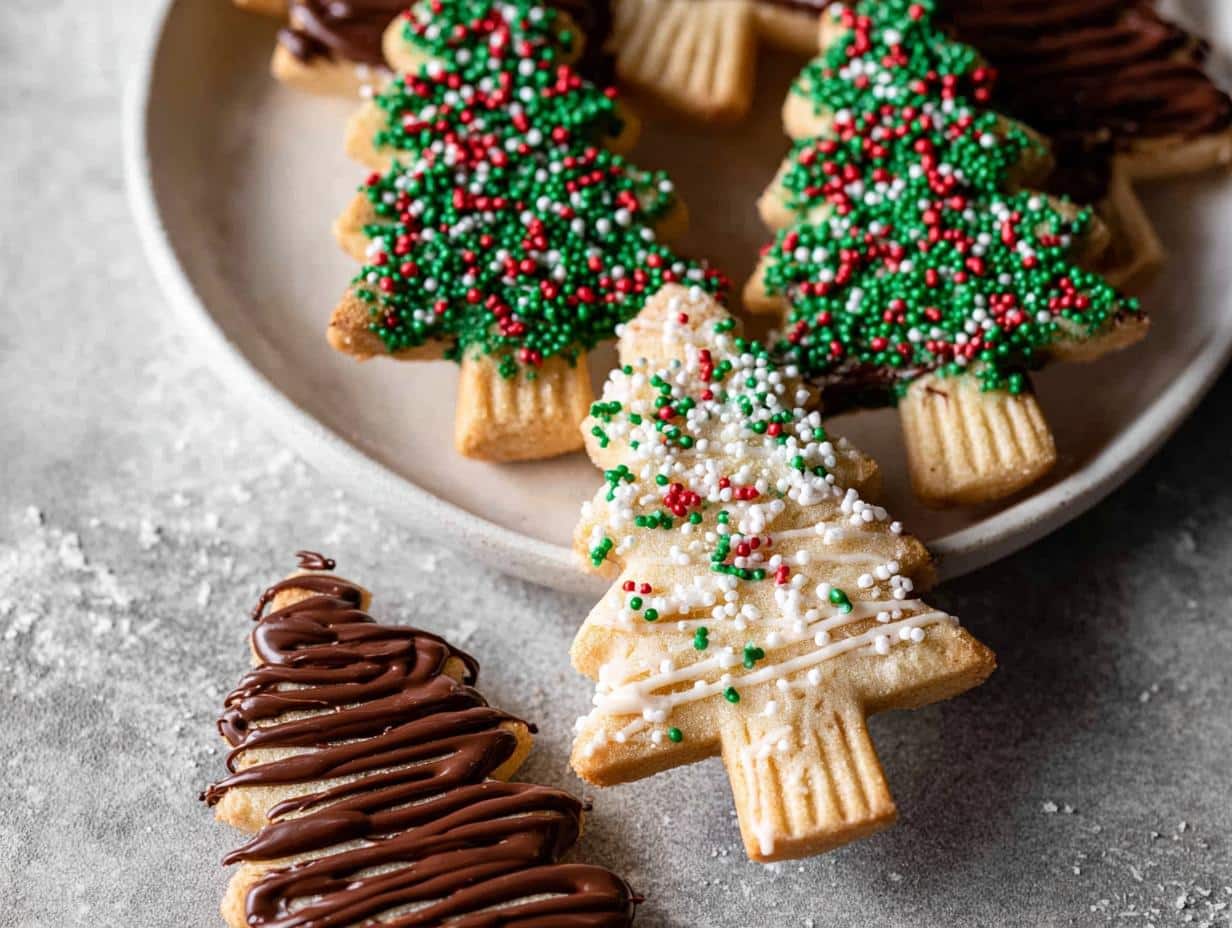
I’ll never forget the first time I made Christmas Shortbread Trees with my niece and nephew. Flour was everywhere, giggles filled the kitchen, and by the time we finished decorating those buttery little trees with chocolate and sprinkles, we’d created more than just cookies – we’d made memories. That’s the magic of this recipe. As someone who’s baked holiday treats for over a decade, I can tell you these simple shortbread trees capture everything I love about Christmas baking: they’re easy enough for kids to help with, look adorable on cookie trays, and taste like pure holiday joy.
Why You’ll Love These Christmas Shortbread Trees
Oh, where do I even start? These darling little cookies have become my go-to holiday treat for so many reasons! First off, they’re ridiculously simple to make – just a handful of pantry staples and you’re halfway there. The dough comes together in minutes, and the shaping is so forgiving that even my butter-fingered nephew can’t mess them up.
But the real magic happens when you decorate them. That’s when these Christmas shortbread trees truly shine. The blank canvas of buttery shortbread just begs for creativity – pipe some chocolate branches, toss on some sparkly sprinkles, and suddenly you’ve got edible holiday artwork that’ll wow everyone at your cookie exchange.
Here’s why these have earned a permanent spot in my holiday baking lineup:
- They’re practically foolproof – perfect for baking with kids (or stressed-out adults!)
- The simple ingredients mean you can whip them up anytime a holiday craving strikes
- They look fancy but take minimal effort (our little secret!)
- Everyone goes nuts for them – they disappear faster than presents on Christmas morning
Trust me, once you see how these golden little trees brighten up your cookie tray, you’ll understand why they’ve become my favorite holiday tradition.
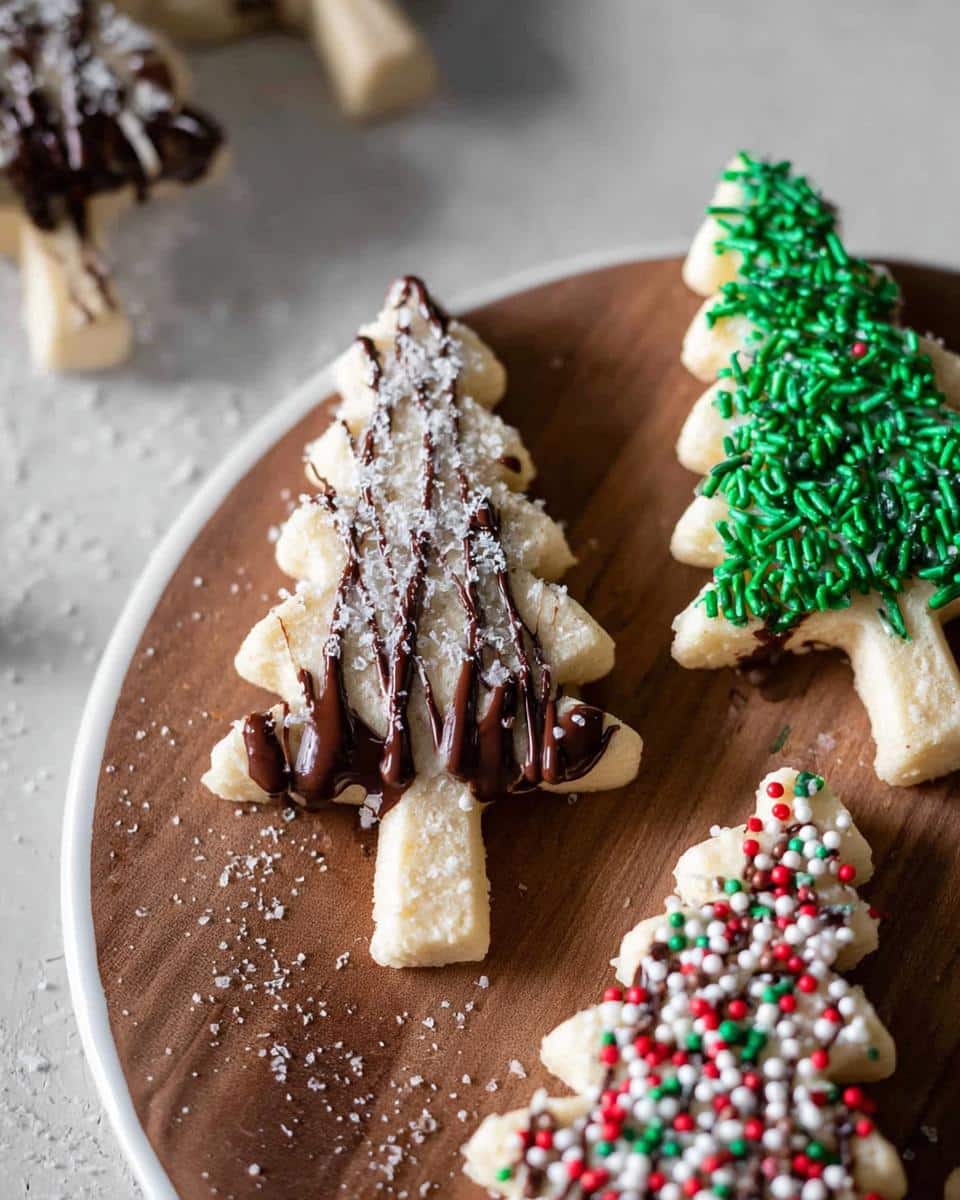
Ingredients for Christmas Shortbread Trees
Okay, let’s gather our magical ingredients for these festive little trees! The beauty of this recipe is its simplicity – just a few basics from your pantry and fridge. But let me tell you, these humble ingredients transform into something truly special. Here’s exactly what you’ll need (no kitchen witch magic required, promise):
- ½ cup (65g) all-purpose flour (spoon it into the measuring cup and level it off – no packing!)
- 3 tablespoons powdered sugar (the secret to that melt-in-your-mouth texture)
- 1 tablespoon cornstarch (for extra tenderness)
- ⅛ teaspoon baking powder (just a pinch to give them lift)
- A tiny pinch of salt (trust me, it makes all the flavors pop)
- ¼ cup (57g) unsalted butter softened to room temperature (this is crucial – you should be able to press your finger in and leave an indent)
For decorating your edible Christmas forest (the fun part!):
- 8oz (225g) Baker’s chocolate or candy melts (go for dark, milk, or white – they’re all delicious)
- Your favorite sprinkles (I’m partial to the green and red ones that look like tiny ornaments)
That’s it! See? I told you it was simple. Now let’s make some holiday magic happen!
How to Make Christmas Shortbread Trees
Alright, let’s get our hands floury and make some magic happen! Making these Christmas Shortbread Trees is so easy, you’ll be done before you can say “Jingle Bells.” I’ve baked these dozens of times (okay, maybe hundreds – don’t judge my holiday enthusiasm!), and this method never fails me.
- Mix it up: First, throw all your dry ingredients together (that’s flour, powdered sugar, cornstarch, baking powder, and that tiny pinch of salt) in a bowl. Add your softened butter and mix until it comes together into a soft dough. If it feels crumbly, that’s okay – just give it a gentle knead with your hands. The warmth from your fingers will help everything stick together beautifully.
- Roll & chill: Here’s my secret weapon – roll your dough out between two sheets of floured parchment paper (about ¼ inch thick) and pop it in the freezer for 10-15 minutes. This makes cutting shapes SO much easier, trust me!
- Shape your trees: Now for the fun part! Use a sharp knife to cut your dough into 3-inch sticks, about ¼ to ½ inch wide. If you’re making these with kids, you can let them help here – just supervise those little hands with the knife! Freeze again for another 10 minutes to keep those perfect tree shapes.
- Bake to perfection: Bake at 325°F for 8-11 minutes. You’ll know they’re ready when the edges get that perfect light golden brown. Don’t let them get too dark – we want that buttery, melt-in-your-mouth texture. Let them cool completely before decorating (I know it’s hard to wait!).
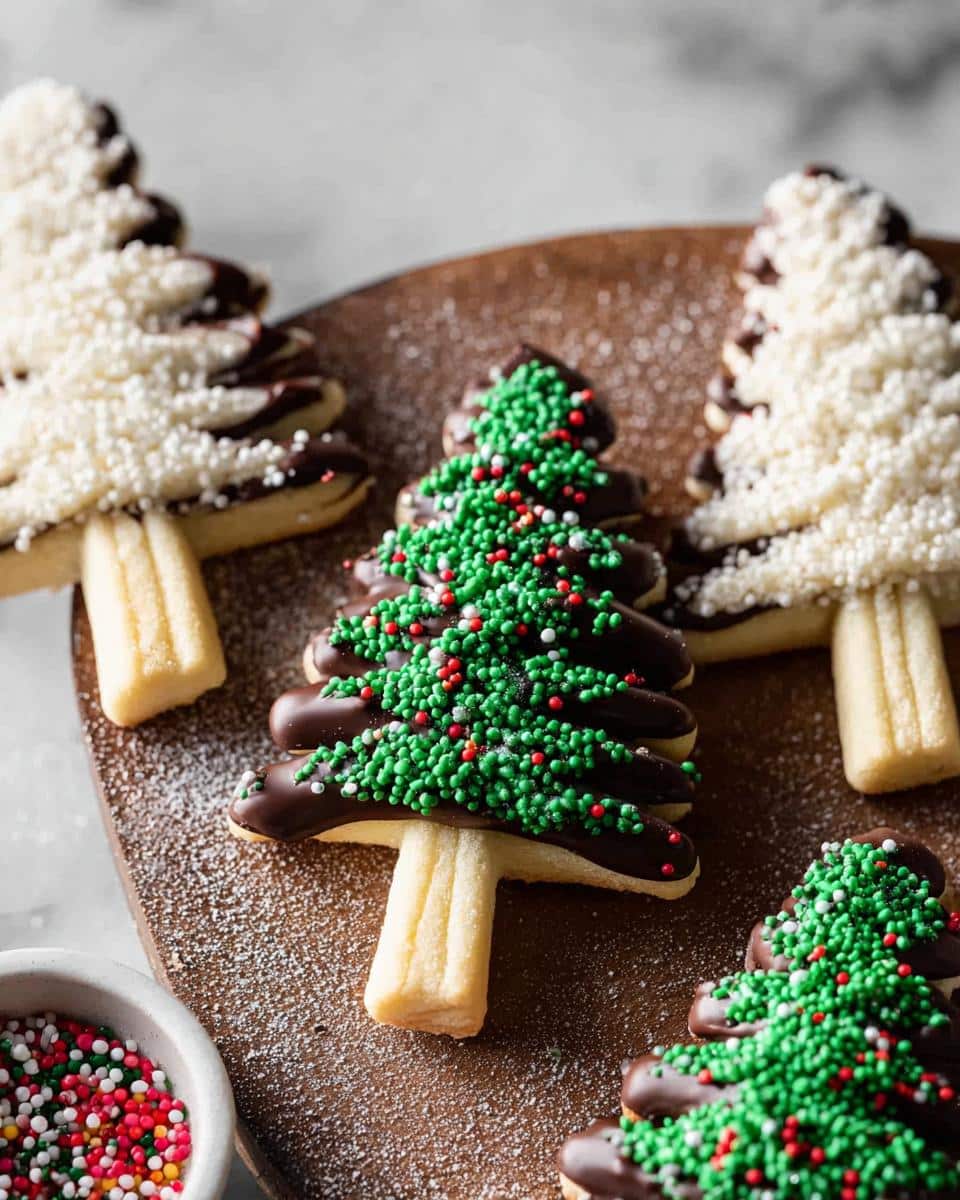
- Decorate with joy: Melt your chocolate (I like using a double boiler method for smooth results) and let it cool slightly before piping. Then go wild with your decorations! Pipe little chocolate branches and add sprinkles while the chocolate’s still wet. Freeze for 5-10 minutes to set everything, and voila – edible Christmas art!
Tips for Perfect Christmas Shortbread Trees
Over the years, I’ve picked up some tricks to make these trees foolproof:
- Chill, chill, chill – Seriously, don’t skip the freezer time! It makes shaping and cutting so much easier.
- Size matters – For sturdier trees, keep them about ½ inch wide. Too thin, and they might break when you decorate!
- Candy melts to the rescue – If you’re impatient (like me!), use candy melts instead of chocolate – they set faster and come in fun holiday colors.
- Flour is your friend – Keep your work surface and hands lightly floured to prevent sticky situations.
Decorating Your Christmas Shortbread Trees
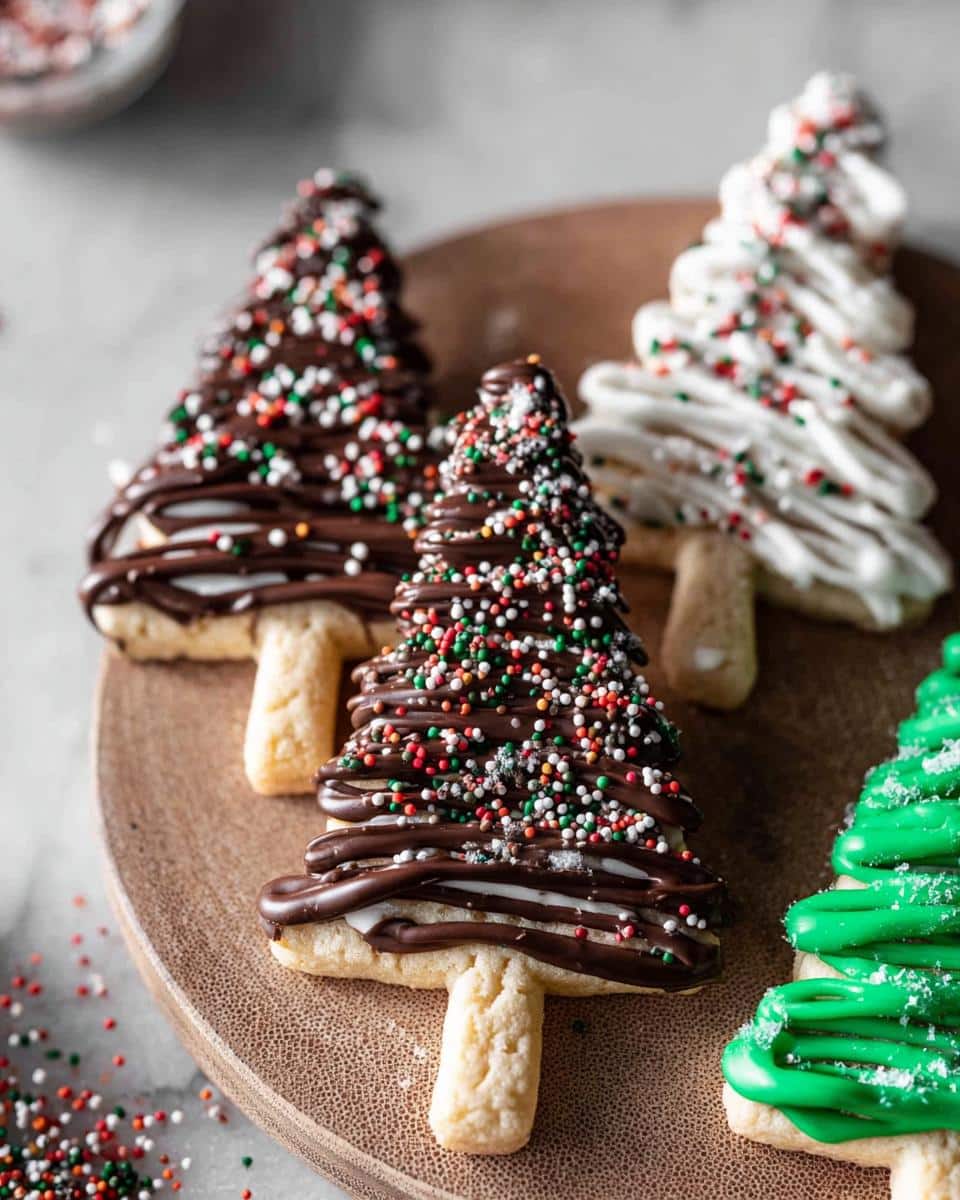
Oh friends, this is where the real holiday magic happens! Decorating these Christmas shortbread trees is my absolute favorite part – it’s like being five years old again with edible craft supplies spread across the counter. I always tell first-timers: don’t stress about perfection here. Some of my best cookie memories came from “happy little accidents” (as Bob Ross would say) when decorating went delightfully messy.
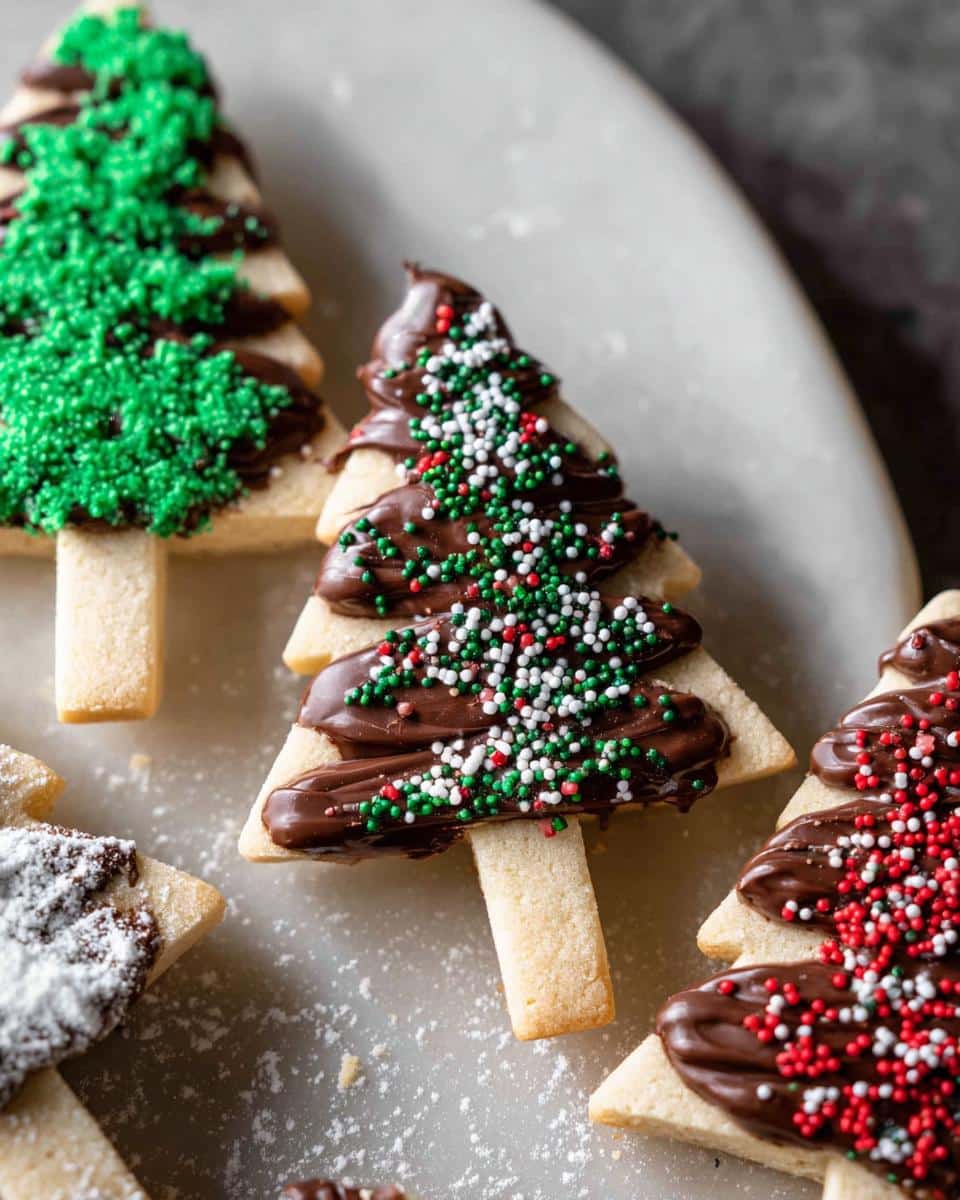
My go-to method? Melted chocolate piped in zig-zag lines to make pine branches – it’s easier than you think! Just snip a tiny corner off a plastic bag and drizzle away. Want to really impress? Alternate between milk and white chocolate for a frosted evergreen look. While the chocolate’s still wet, go wild with sprinkles! I raid the bulk bins for mini red and green nonpareils that look like Christmas lights.
If you’re feeling fancy like the Valentine cookies pros, try dragging a toothpick through wet icing to create snowy tree textures. Or for a winter wonderland effect, dust the tops with edible glitter before the chocolate sets. My niece’s brilliant addition last year? Crushed peppermint stuck to the “trunk” area to look like presents under the tree!
Pro tip: When your masterpieces are decorated to holiday perfection, pop them in the freezer for 5-10 minutes. This sets the chocolate instantly so you can stack them or package them up. Honestly, the decorating possibilities are endless – just follow your merry heart and have fun with it!
Storing and Gifting Christmas Shortbread Trees
Now that you’ve created these adorable edible evergreens, let’s talk about keeping them fresh (if they last that long!). I store mine in an airtight container at room temperature – they’ll stay perfect for about a week. For longer storage, pop them in the freezer between layers of parchment paper; they’ll keep for up to 2 months this way!
These make the sweetest homemade gifts too. I love packing them in festive cookie tins or clear cellophane bags tied with ribbon. Add a handwritten tag, and you’ve got a present that tastes as good as it looks. Just be warned – once people try these buttery delights, they’ll be asking you to make them every year!
Christmas Shortbread Trees FAQs
Over the years, I’ve gotten all sorts of questions about these festive little trees – here are the ones that pop up most often in my kitchen (and my inbox!):
Can I use margarine instead of butter?
Oh honey, I know butter can be pricey, but trust me – it’s worth it here. Margarine just doesn’t give that same rich, melt-in-your-mouth quality. If you must substitute, go for a high-quality European-style butter alternative, but the real deal makes all the difference!
How long do they stay fresh?
These little trees keep beautifully! In an airtight container at room temp, they’ll stay perfect for about a week. If your house is warm, you might want to store them in the fridge – just let them come to room temp before serving for that perfect shortbread texture.
Can I freeze undecorated cookies?
Absolutely! In fact, I often make a double batch and freeze half. Just wrap them well in plastic wrap or pop them in a freezer bag with parchment between layers. They’ll keep for 2 months frozen – perfect for when holiday guests surprise you!
Help! My dough is too crumbly!
No worries – this happens to me sometimes too! Just knead it gently with your hands for 30 seconds. The warmth from your fingers helps the butter soften slightly and brings it all together. If it’s really stubborn, add a teaspoon of cold water (but no more!).
Can kids help decorate these?
Are you kidding? That’s half the fun! Little hands are perfect for sprinkling on decorations. Just melt the chocolate yourself (safety first!) and let them go wild with the sprinkles. Some of my favorite cookie memories come from messy decorating sessions with kids!
Nutritional Information
Just a quick note about nutrition – these values are rough estimates since ingredients vary by brand. While I don’t count calories during the holidays (who does?), I want you to know these little trees are made with real, simple ingredients. The exact numbers change based on your chocolate and sprinkles, but one thing’s certain – every bite delivers pure holiday happiness!
Print
Christmas Shortbread Trees
- Total Time: 35 min
- Yield: 20 cookies 1x
- Diet: Vegetarian
Description
Easy festive shortbread cookies shaped like trees and decorated with chocolate and sprinkles.
Ingredients
- ½ cup (65g) all-purpose flour, spooned and leveled
- 3 tablespoons powdered sugar
- 1 tablespoon cornstarch
- ⅛ teaspoon baking powder
- pinch of salt
- ¼ cup (57g) unsalted butter, softened to room temperature
- 8oz (225g) Baker’s chocolate or candy melts
- Sprinkles (optional)
Instructions
- Mix all shortbread ingredients until a soft dough forms. Knead lightly if needed.
- Roll dough to ¼ inch thickness on floured parchment paper. Freeze for 10-15 minutes.
- Cut dough into 3-inch sticks, ¼ to ½ inch wide. Freeze again for 10 minutes.
- Bake at 325°F for 8-11 minutes until edges are lightly browned. Cool completely.
- Melt chocolate in microwave or double boiler. Let cool slightly.
- Pipe tree branches onto cookies. Add sprinkles if desired.
- Freeze for 5-10 minutes to set chocolate. Serve or use for decoration.
Notes
- Chill dough thoroughly for easier handling.
- Adjust cookie size for sturdier trees.
- Use candy melts for quicker setting.
- Prep Time: 25 min
- Cook Time: 10 min
- Category: Dessert
- Method: Baking
- Cuisine: American
Nutrition
- Serving Size: 1 cookie
- Calories: 80
- Sugar: 5g
- Sodium: 10mg
- Fat: 5g
- Saturated Fat: 3g
- Unsaturated Fat: 1g
- Trans Fat: 0g
- Carbohydrates: 8g
- Fiber: 0g
- Protein: 1g
- Cholesterol: 10mg
Keywords: Christmas Shortbread Trees, Holiday Baking, Christmas Treats Easy, Christmas Dessert Ideas Easy

