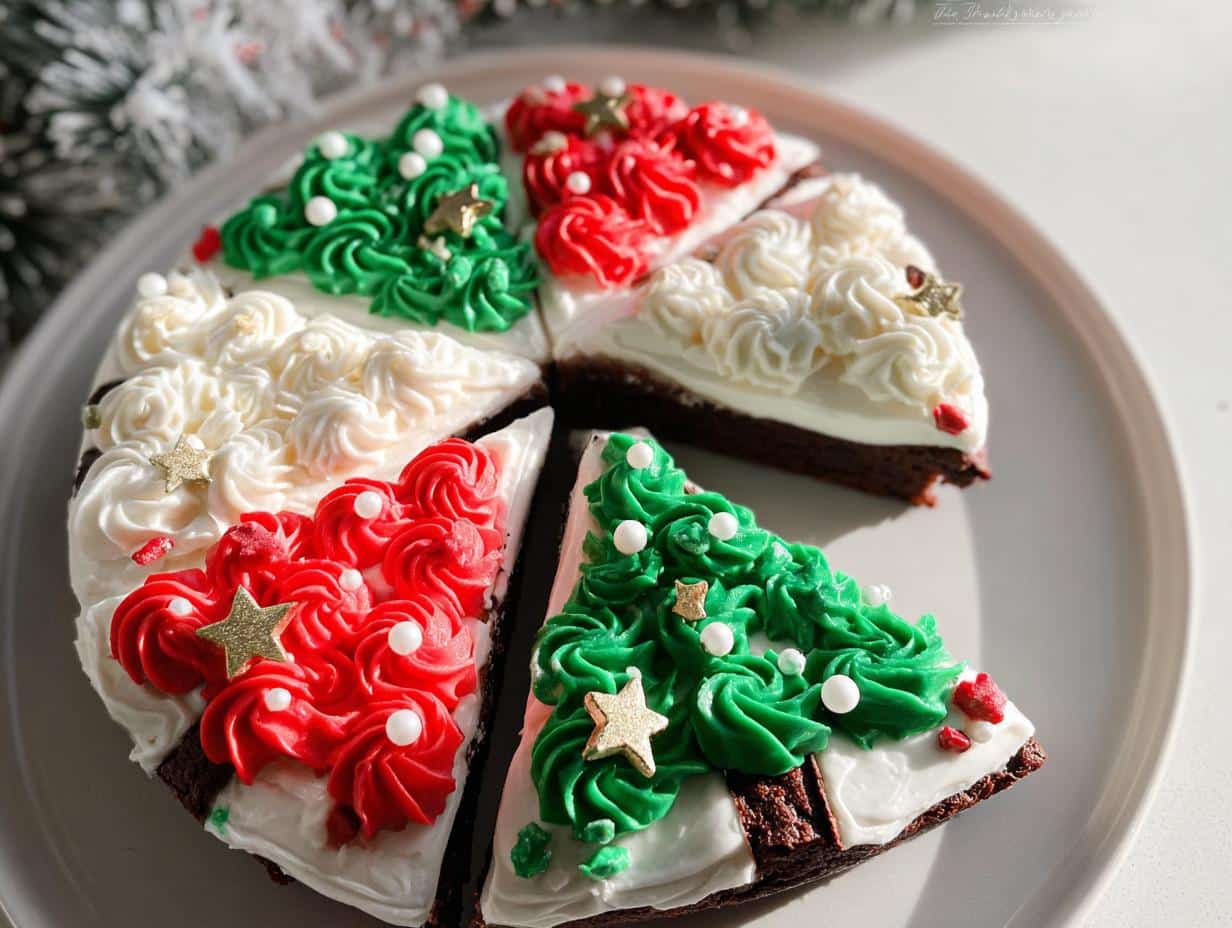
There’s something magical about holiday baking—the way the kitchen fills with the scent of chocolate, the sound of laughter as family gathers around, and the excitement of creating something special together. That’s exactly why I fell in love with Frosted Christmas Tree Brownies. Last year, my kids and I turned a simple afternoon into one of our favorite holiday memories when we made them for the first time. Flour ended up on the floor instead of in the bowl, frosting found its way onto little noses, and our Christmas tree brownies looked more like abstract art than perfect triangles. But you know what? That messy, imperfect afternoon is now one of our most cherished traditions. These festive treats aren’t just delicious—they’re an invitation to slow down, create together, and savor the sweet moments of the season. Whether you’re baking with kids, grandkids, or just your inner child, these brownies promise to bring holiday cheer to your kitchen and your dessert table.
Why You’ll Love These Frosted Christmas Tree Brownies
Let me tell you why these brownies have become my must-make holiday treat! First, they’re the perfect family activity – my kids love decorating them almost as much as eating them. Second, they couldn’t be easier – we’re talking boxed mix simple (though I sometimes use my favorite chocolate peppermint bread recipe as inspiration for the flavors).
But the real magic happens when you see them all decorated – those little tree shapes with their festive frosting look like they came from a fancy bakery! And the taste? Pure holiday happiness. The rich chocolate pairs perfectly with the sweet frosting, making them disappear faster than cookies left out for Santa.
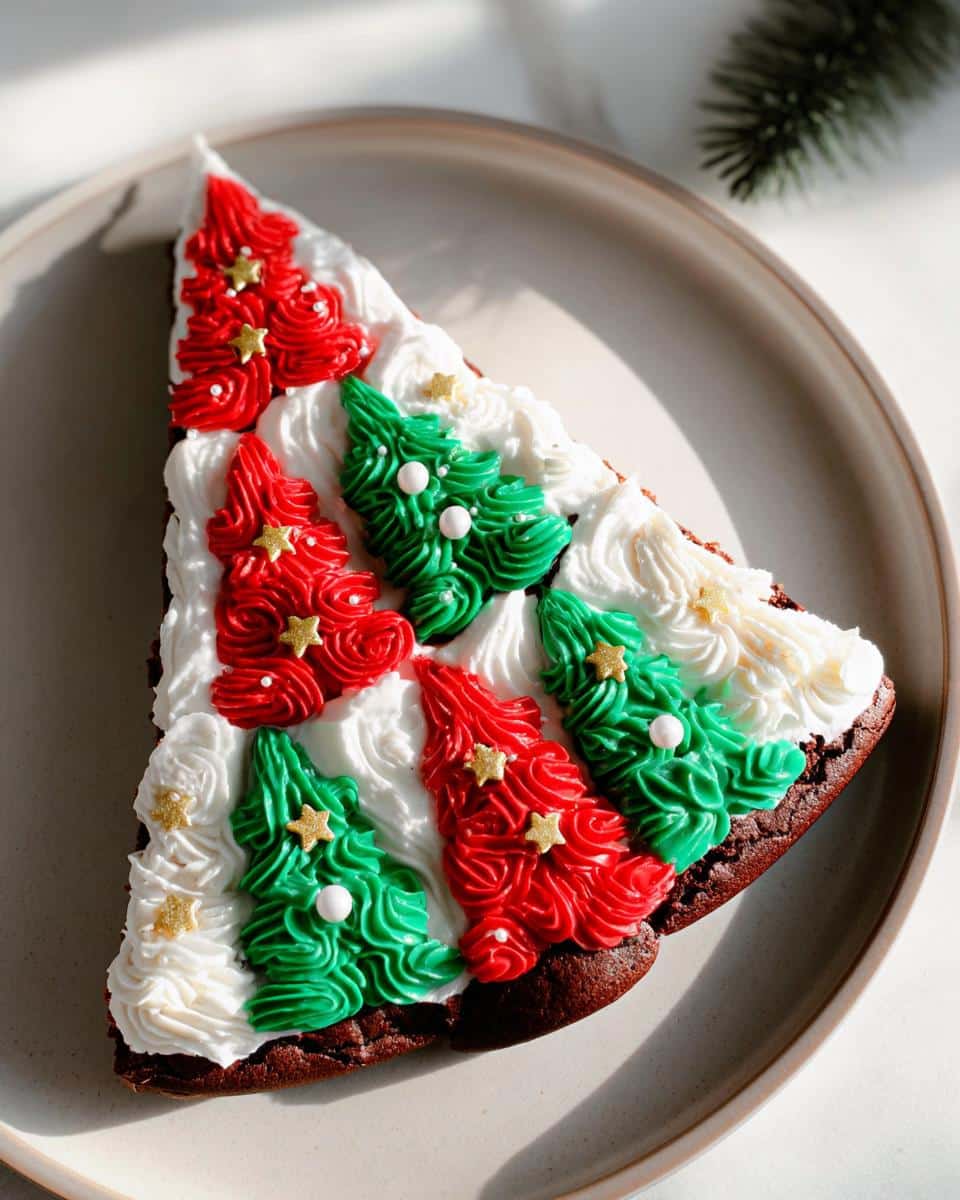
Whether you’re baking with kids or just want a showstopping dessert that’s secretly easy, these brownies deliver all the holiday cheer with none of the stress. That’s why they’ve earned a permanent spot on my Christmas baking list!
Ingredients for Frosted Christmas Tree Brownies
Gathering these simple ingredients is half the fun! I always make sure to have everything ready before calling the kids into the kitchen – it keeps the chaos to a minimum (well, sort of). Here’s what you’ll need to make these festive treats:
- For the brownies: 2 boxes of your favorite brownie mix (or make a double batch of homemade if you’re feeling fancy)
- For the frosting: 1-3 jars of white frosting (trust me, you’ll want extra for those creative decorators in your family)
- For coloring: Edible gel food coloring in red and green – the gel kind gives the brightest colors without thinning the frosting
- For decorating: Edible gold stars and white pearl sprinkles (these make the trees look magical!)
- Tools: Icing bags and a large star frosting tip (I use the 1M tip – it makes perfect little frosting swirls)
That’s it! Simple ingredients that transform into something truly special. The best part? You probably have most of this in your pantry already!
How to Make Frosted Christmas Tree Brownies
Okay, let’s get baking! I promise this is easier than untangling Christmas lights. First, preheat your oven according to your brownie mix instructions – mine usually calls for 350°F. Grab that springform pan (trust me, it’s worth the extra minute to find it) and give it a good spray with cooking oil. No springform? No problem! A regular round cake pan works too, just line it with parchment paper first.
Now, mix up both boxes of brownie batter – I like to use the banana bread brownies recipe when I’m feeling extra festive. Pour all that chocolatey goodness into your prepared pan and pop it in the oven. The hardest part? Waiting! Bake until a toothpick comes out with just a few moist crumbs – about 30 minutes in my oven.
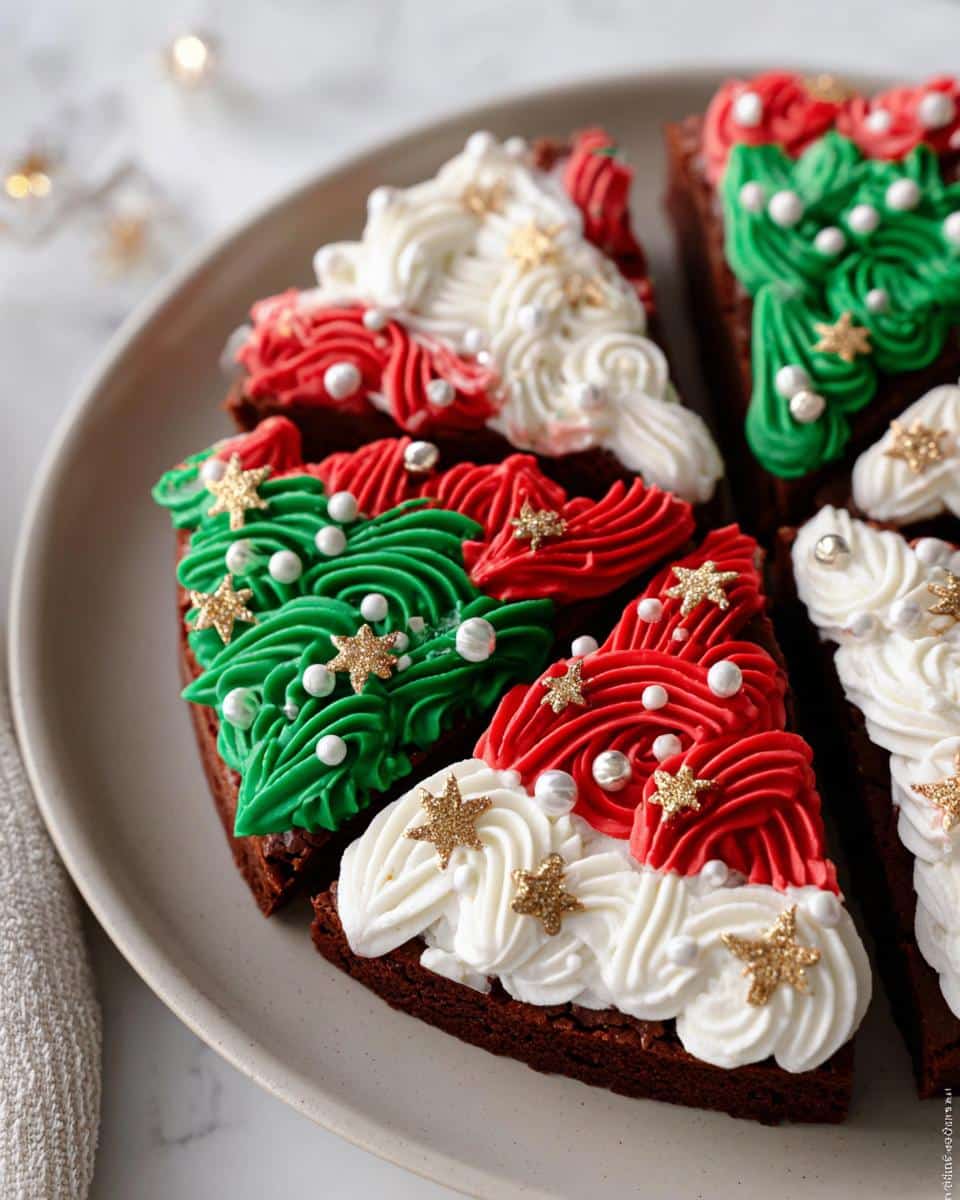
Here’s the secret step: let those brownies cool completely. I know, I know – the temptation is real. But if you cut them warm, you’ll end up with crumbly mess instead of perfect little trees. I usually let mine sit for at least an hour – perfect time to clean up and get the frosting ready!
Decorating Your Frosted Christmas Tree Brownies
This is where the magic happens! Divide your white frosting into three bowls – leave one white, color one green, and one red. Now grab those icing bags with the star tip (the 1M makes perfect little swirls). Let the kids help pipe the frosting – it’s okay if it’s not perfect, that’s part of the charm!
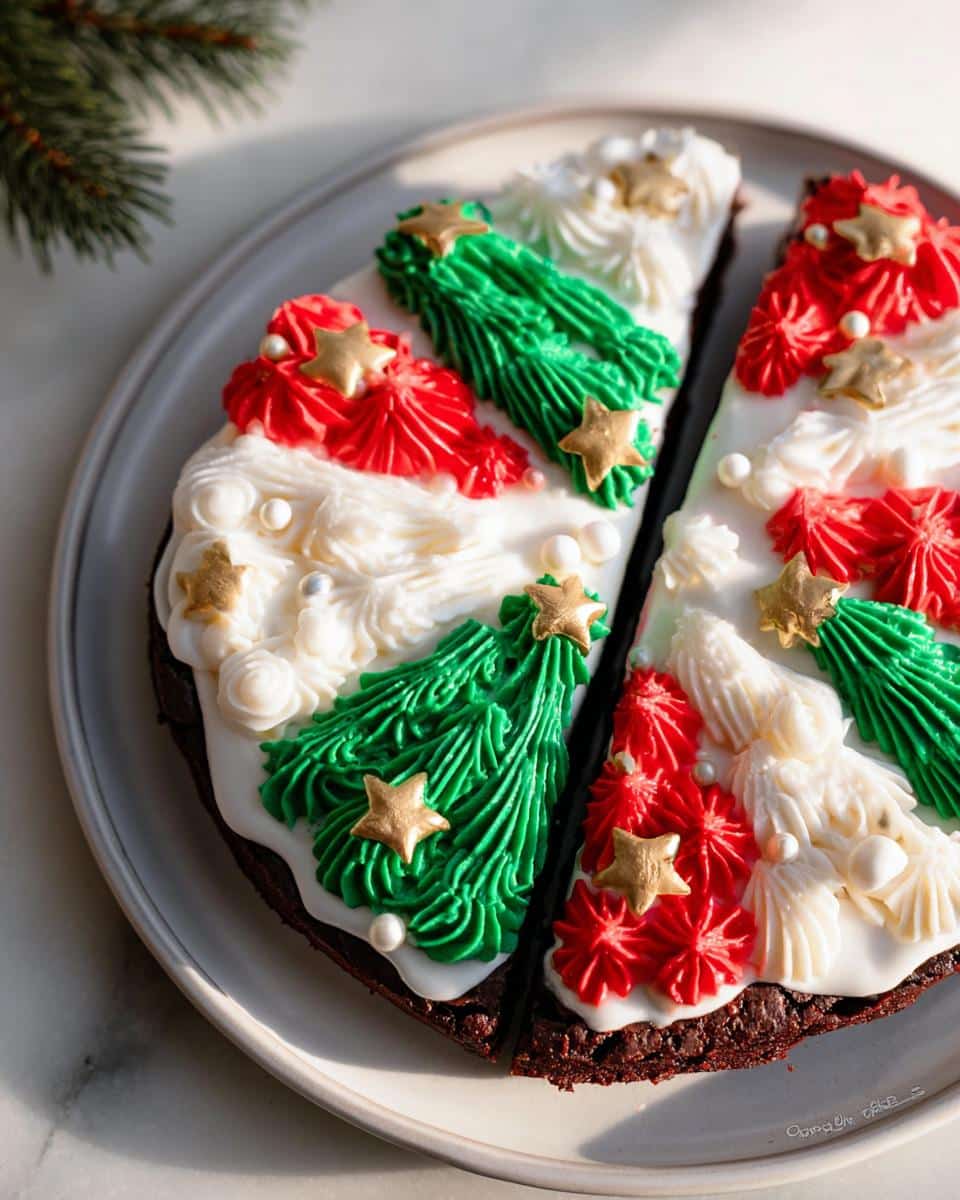
Start with green frosting for the trees, making little zig-zags from top to bottom. Add a white frosting “star” on top and red “ornaments” if you’re feeling fancy. The pearl sprinkles look like twinkling lights, and those edible gold stars? Pure Christmas magic. Pro tip: give each decorator their own brownie to decorate – less arguing, more creating!
Tips for Perfect Frosted Christmas Tree Brownies
After making these festive treats more times than I can count (and learning from plenty of happy accidents), here are my best tips for brownie success! First, that springform pan really is worth it – it lets you remove the brownies without mangling them. If you don’t have one, line a regular pan with parchment paper with extra hanging over the sides to lift them out.
Cooling is non-negotiable – I know it’s tempting to dive right in, but warm brownies crumble when you cut them. I usually pop mine in the fridge for 30 minutes if I’m in a hurry. When decorating, keep a damp paper towel nearby to wipe messy little fingers (and your own frosting-covered hands). And here’s my secret – pipe a thin layer of white frosting first, then add the colored decorations. It acts like glue for the sprinkles!
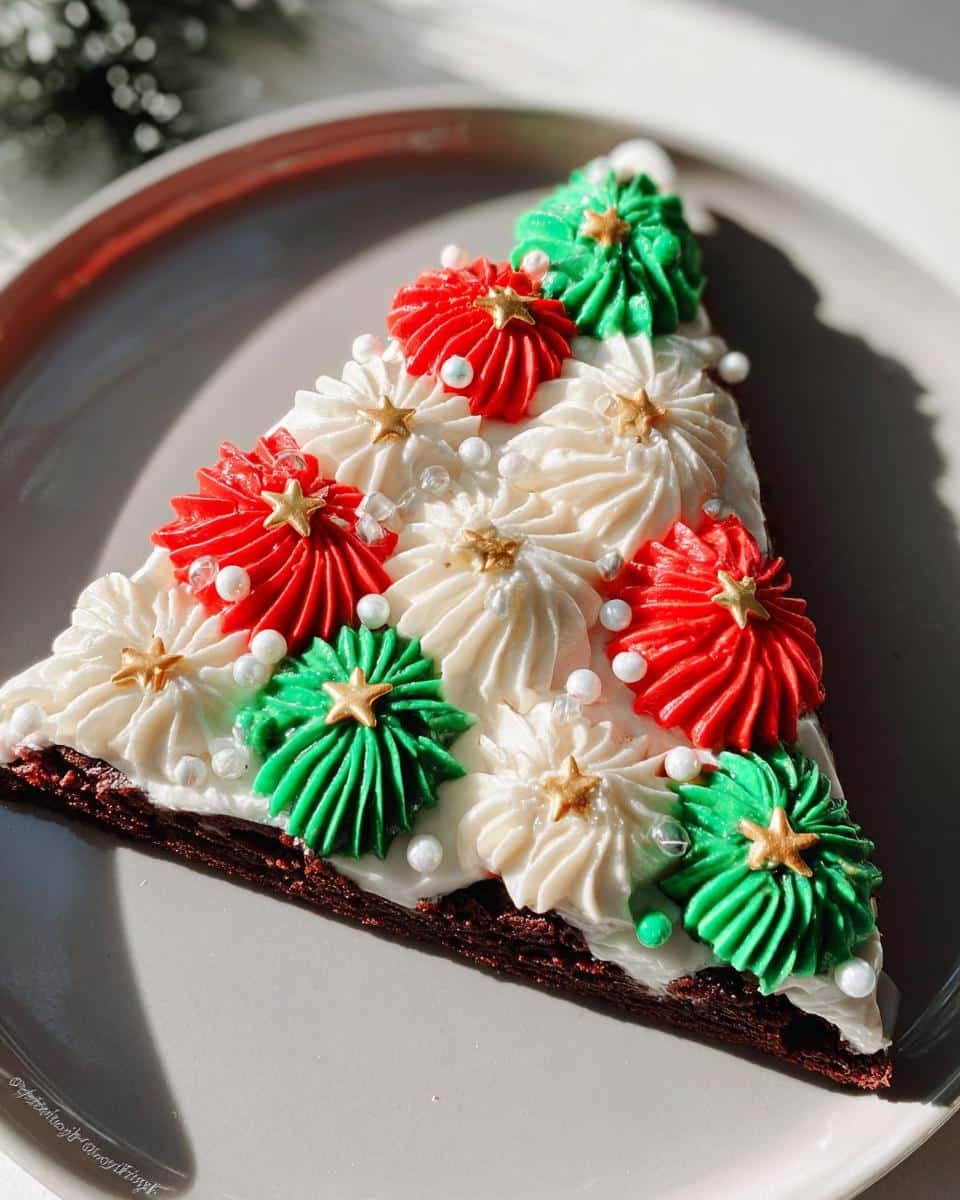
Most importantly? Have fun with it! Imperfect trees taste just as delicious as perfect ones, and those messy moments make the best memories.
Frosted Christmas Tree Brownies Variations
Oh, the fun we’ve had playing with different versions of these brownies! One year we did a “winter wonderland” theme with blue frosting and silver sprinkles – my daughter declared them “Elsa trees.” For a peppermint twist, add a drop of peppermint extract to the white frosting and crush some candy canes for “ornaments.” Feeling fancy? Melt some chocolate and drizzle it like garland across your trees. The possibilities are endless – just follow your holiday spirit!
Serving and Storing Frosted Christmas Tree Brownies
These brownies are showstoppers on any holiday dessert table – I love arranging them in a circle to look like a little forest! If you’re lucky enough to have leftovers (rare in my house), store them in an airtight container at room temperature for up to 3 days. The frosting keeps them surprisingly moist! Want to enjoy them warm? Just pop one in the microwave for 10 seconds – it’ll taste freshly baked with melty frosting. Perfect for sneaking a late-night holiday treat!
Frosted Christmas Tree Brownies FAQs
Can I use homemade brownies instead of boxed mix?
Absolutely! I actually love using my favorite homemade brownie recipe when I have extra time. Just make sure it’s a nice thick batter that will hold its shape when cut into triangles. The key is baking them in a round pan – springform works best – so you can create those perfect tree shapes.
How long do these Christmas brownies last?
They’ll stay fresh for about 3 days stored at room temperature in an airtight container. The frosting actually helps keep them moist! If you need them to last longer, you can refrigerate them for up to a week – just let them come to room temperature before serving for the best texture.
What’s the easiest way to cut the brownies into triangles?
I’ve found the pizza cutter trick works like magic! First, cut your round brownie in half, then cut each half into quarters. You’ll get eight perfect triangles – just like slicing a pie. Pro tip: wipe your cutter clean between cuts for the neatest edges.
Can kids really help decorate these?
Oh my goodness, yes! That’s the best part. Even my littlest ones (with supervision) can pipe frosting and sprinkle decorations. I give each child their own brownie to decorate – it keeps the peace and lets their creativity shine. Just be prepared for some… abstract Christmas tree art (which tastes just as delicious!).
What if I don’t have a star piping tip?
No worries! You can use a zip-top bag with the corner snipped off – just make little dots of frosting instead of swirls. Or skip the piping altogether and spread the frosting with a knife, then decorate with sprinkles. The holiday spirit is in the fun, not perfection!
Nutritional Information
Just between us, I’m all about enjoying holiday treats without stressing over numbers! These brownies’ nutrition can vary based on the brands you use and how generously you frost them (we won’t tell if you go heavy on the sprinkles!). While I can’t provide exact counts, remember – Christmas calories don’t count when they’re made with love!
Share Your Frosted Christmas Tree Brownies
I’d love to see your festive creations! Snap a photo of your Christmas tree brownies (imperfections and all – that’s where the charm is!) and tag me on social media. Or leave a comment below telling me about your baking adventure – did the kids decorate more than the brownies? I’ve been there! Sharing these sweet moments is what makes holiday baking so special.
Print
Frosted Christmas Tree Brownies
- Total Time: 45 min
- Yield: 8 servings 1x
- Diet: Vegetarian
Description
A festive holiday dessert that’s fun to make and decorate with family.
Ingredients
- 2 boxes of brownie mix or a double batch of homemade brownies
- 1–3 jars of white frosting
- Edible gel food coloring (red and green)
- Edible gold stars
- White pearl sprinkles
- Icing bags
- Frosting tips (large star – 1M)
Instructions
- Preheat the oven according to your brownie mix instructions. Spray a 9-inch springform pan with oil.
- Mix both brownie mixes and pour into the pan.
- Bake as directed or until a toothpick comes out clean.
- Let the brownie cool, then remove from the pan and cut into 8 triangles.
- Mix white frosting with red food coloring in one bowl and green in another.
- Fill icing bags with red, green, and white frosting using the star tip.
- Decorate the brownies with frosting, pearl sprinkles, and gold stars.
- Serve and enjoy.
Notes
- Use a springform pan for easy removal.
- Let brownies cool completely before cutting.
- Involve kids in decorating for a fun activity.
- Prep Time: 15 min
- Cook Time: 30 min
- Category: Dessert
- Method: Baking
- Cuisine: American
Nutrition
- Serving Size: 1 brownie triangle
- Calories: 280
- Sugar: 25g
- Sodium: 180mg
- Fat: 12g
- Saturated Fat: 4g
- Unsaturated Fat: 6g
- Trans Fat: 0g
- Carbohydrates: 40g
- Fiber: 2g
- Protein: 3g
- Cholesterol: 20mg
Keywords: holiday baking, Christmas treats, easy dessert, Christmas party food, festive brownies

