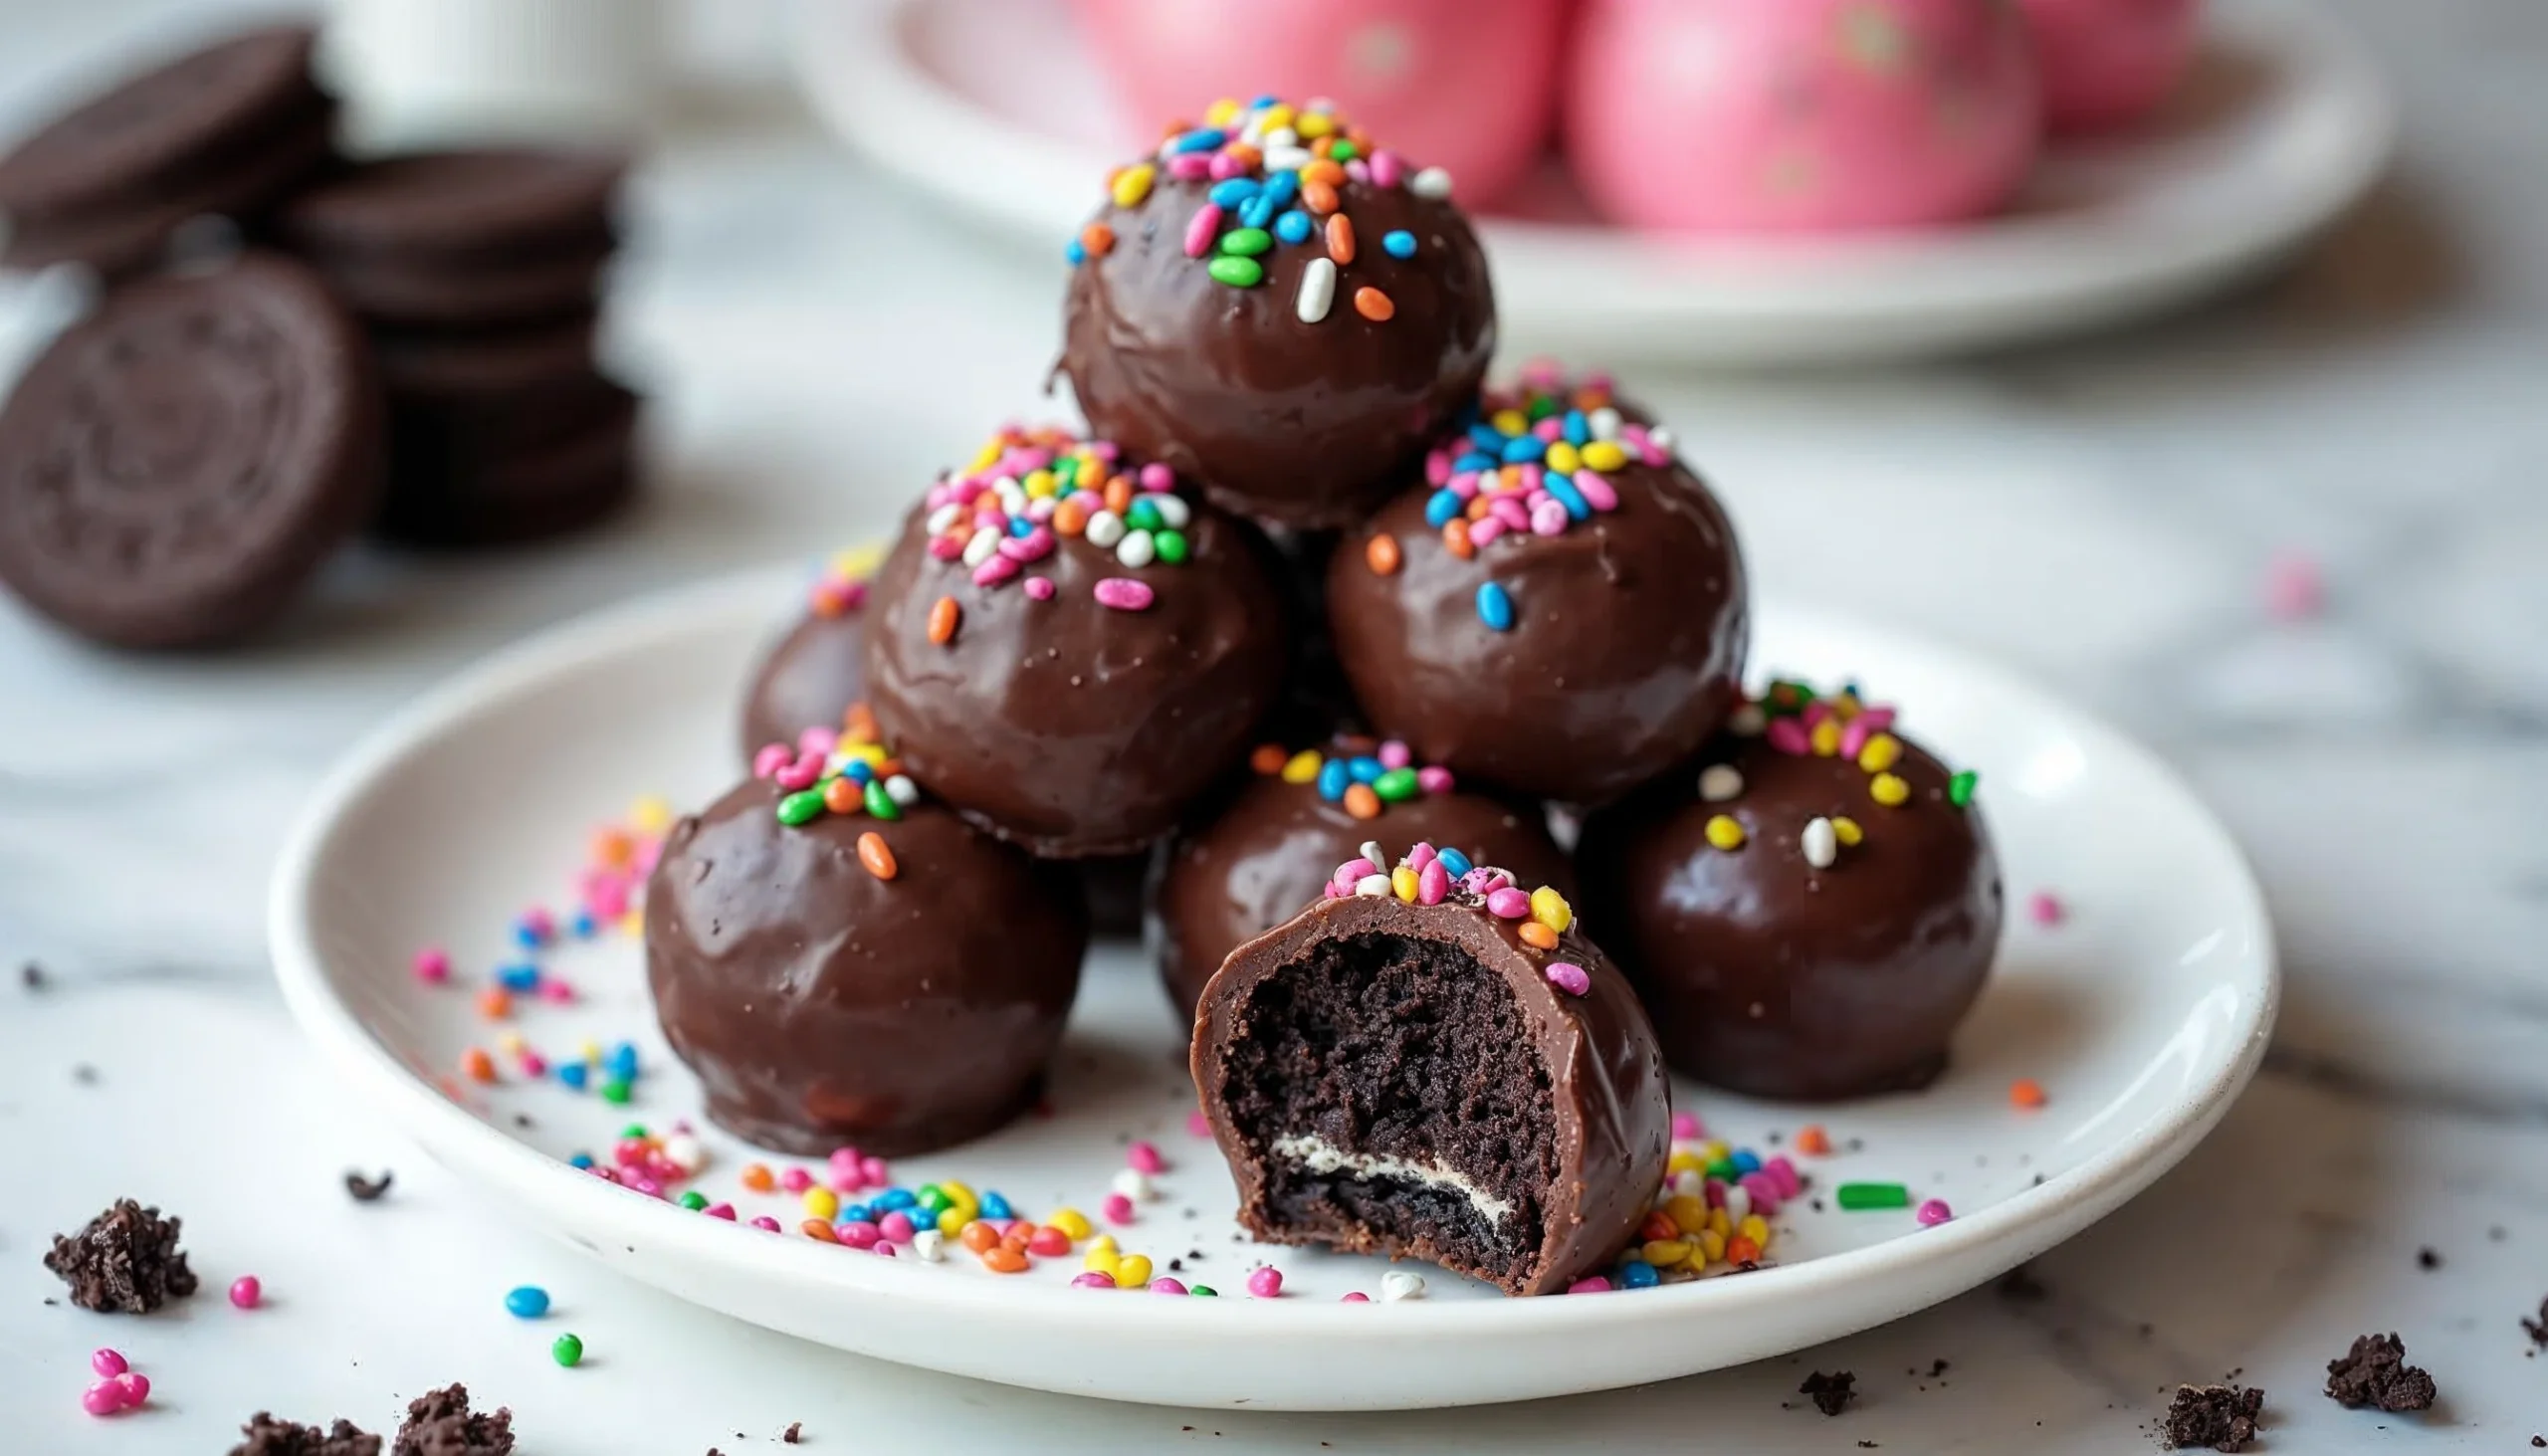
Craving a quick, delicious treat that doesn’t require hours in the kitchen? No-Bake Oreo Balls are here to save the day! Whether you’re juggling a busy schedule or just not in the mood to turn on the oven, this recipe is the perfect solution. With just a handful of ingredients and a few easy steps, you’ll have a dessert that’s as fun to make as it is to eat. Plus, they’re super customizable—you can add your own twist to fit any occasion.
First, imagine biting into a creamy, chocolatey ball of Oreo goodness—pure bliss, right? Next, think about how versatile they are, perfect for parties, holiday treats, or even a midnight snack. You can dress them up with colorful sprinkles or keep it classic with a smooth chocolate coating.
So, why wait? Dive into this simple and oh-so-satisfying recipe! You’ll not only impress yourself but also anyone lucky enough to share these bites of happiness with you. Let’s get rolling!
Why No-Bake Oreo Balls Are the Perfect Dessert
Quick Prep and No Oven Needed
No-bake Oreo balls are the ultimate quick treat! You only need a few minutes and a handful of ingredients to whip up these delightful bites. There’s no need to preheat the oven or spend hours in the kitchen. First, you crush the Oreos, then mix them with cream cheese to create a delicious, soft dough. After that, roll them into bite-sized balls, and you’re already halfway done! Next, the fun part comes—dipping them into melted chocolate for that smooth, glossy finish. It’s simple and perfect for beginners, so even kids can join in. Since you don’t need any baking skills or fancy equipment, these no-bake Oreo balls are a great recipe for anyone. Whether you’re short on time or just want an easy dessert, these treats have you covered. Plus, cleanup is super easy too. What’s not to love about that?
Crowd-Pleasing Treat for Any Occasion
No-bake Oreo balls are a guaranteed hit no matter where you bring them. From birthday parties to holiday gatherings, these little bites of joy fit right in. Their rich, creamy flavor and chocolatey coating make them irresistible to anyone with a sweet tooth. Plus, they’re easy to customize! You can add sprinkles, drizzle colored chocolate on top, or even mix in other fun ingredients. Guests will love that they’re not just tasty but also look impressive on the dessert table. They’re small enough for kids to enjoy without creating a mess, and adults can’t seem to stop at just one. Also, these treats can be made ahead of time, so you’re not stressing out on the big day. If you’re looking for a dessert that’s as fun to eat as it is to make, no-bake Oreo balls are a perfect choice.
Ingredients Needed for No-Bake Oreo Balls
| Ingredient | Role |
|---|---|
| Oreo Cookies | Forms the base of the dough. |
| Cream Cheese | Binds the mixture and adds creaminess. |
| Chocolate (any kind) | Used for the glossy coating. |
The Core Components for a Perfect Mix
To make the best no-bake Oreo balls, you’ll only need a few simple ingredients. First, grab a package of Oreo cookies—the classic kind works best, but you can use flavored ones if you like. Next, you’ll need cream cheese. This is what holds everything together and gives that creamy texture everyone loves. Don’t forget the chocolate for dipping! Whether you prefer milk, dark, or white chocolate, the choice is yours. These three items are the core of the recipe, and they’re so easy to find. Once you’ve got these, you’re already set for success. You won’t believe how such simple ingredients can create something so delicious. Plus, there’s no need for anything fancy, making this recipe perfect for beginners or anyone on a budget. It’s the simplicity that makes no-bake Oreo balls such a winner!
Optional Add-Ons to Elevate Your Recipe
Want to take your no-bake Oreo balls to the next level? It’s easy! Start by adding a splash of vanilla extract to the cream cheese mixture for extra flavor. You can also mix crushed nuts, mini chocolate chips, or coconut flakes into the dough for a fun twist. For toppings, sprinkles are always a hit, especially if you’re making these for a party. Another idea is to drizzle melted white chocolate over the top for a fancy touch. You can even add a pinch of sea salt to the chocolate coating for that sweet-and-salty combo everyone loves. These little changes make the recipe more exciting and allow you to get creative. No matter how you tweak it, these no-bake Oreo balls will always turn out amazing. Your friends and family will be impressed with your creativity!

Step-by-Step Guide to Making No-Bake Oreo Balls
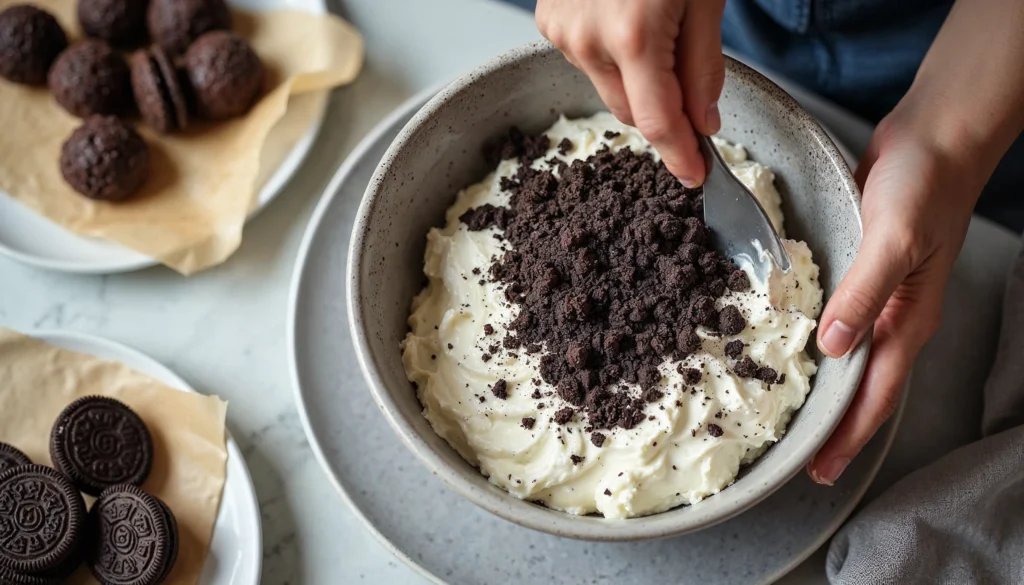
Crushing, Mixing, and Rolling Techniques
Making no-bake Oreo balls is easier than you might think. First, crush the Oreos into fine crumbs. You can use a food processor, but a resealable bag and rolling pin work too. Next, mix the crumbs with softened cream cheese until you get a smooth, sticky dough. It’s like playing with edible Play-Doh! After that, roll the mixture into small balls, about an inch wide. Use your hands to shape them, or a small scoop if you want perfectly even sizes. The process is simple, and it doesn’t take long. Plus, rolling the balls can be a fun activity for kids or anyone who loves getting hands-on in the kitchen. Once you’ve finished, place the balls on a tray lined with parchment paper. Then, chill them in the fridge for at least 20 minutes to firm up before moving on to the next step.
Tips for Dipping in Chocolate Like a Pro
The final step is dipping your no-bake Oreo balls into melted chocolate. First, melt your chocolate using a microwave or double boiler. Make sure it’s smooth and glossy for the best results. Next, use a fork or toothpick to dip each ball, letting any excess chocolate drip off. Place the coated balls back on the parchment-lined tray, and don’t worry if they’re not perfect—it’s part of the charm! To add some flair, sprinkle toppings on while the chocolate is still wet. Once all the balls are coated, pop them in the fridge until the chocolate hardens. This step not only makes them look professional but also gives them that satisfying snap when you bite into them. Dipping can feel like a mini art project, so have fun with it! You’ll be amazed at how good your no-bake Oreo balls turn out.
Creative Twists on the Classic No-Bake Oreo Balls
Flavored Variations for Every Palate
| Variation | Description |
|---|---|
| Flavored Oreos | Try mint, peanut butter, or red velvet varieties. |
| Flavored Extracts | Add almond, peppermint, or other unique flavors. |
| Chocolate Coatings | Experiment with marble effects or multiple layers. |
Who says no-bake Oreo balls have to be classic? You can change them up to suit any taste. Try using flavored Oreos like mint, peanut butter, or red velvet for a fun twist. Another idea is to mix in flavored extracts like almond or peppermint to give them a unique kick. If you’re feeling adventurous, coat them in a blend of two chocolates for a marble effect. These variations are perfect for adding a personal touch to your treats. They’re also a great way to surprise your guests with something new. Whether you stick to the original recipe or experiment with flavors, no-bake Oreo balls are always a crowd-pleaser. The possibilities are endless, and you can get creative with every batch. Once you start exploring different combinations, you’ll see why this recipe is such a hit.
Seasonal Designs and Themes
No-bake Oreo balls aren’t just delicious—they’re also incredibly versatile for any season or celebration. For Halloween, you can turn them into spooky eyeballs with candy decorations. During Christmas, add red and green sprinkles or drizzle with white chocolate to look like snow. For birthdays, go crazy with rainbow-colored sprinkles or edible glitter. These little treats are like a blank canvas, letting you match them to any theme or event. They’re perfect for weddings, baby showers, or even game-day parties. Plus, customizing them is so easy that it becomes part of the fun. Just a few small tweaks can make your no-bake Oreo balls the star of the dessert table. Whether you’re celebrating a big holiday or just making treats for a casual get-together, these bite-sized delights are always a good idea.
Storing and Serving No-Bake Oreo Balls
How to Keep Them Fresh and Delicious
Keeping your no-bake Oreo balls fresh is simple. First, store them in an airtight container to prevent them from drying out. Place a layer of parchment paper between the balls to keep them from sticking together. Then, pop the container in the fridge, where they’ll stay good for up to a week. If you want to make them ahead of time, you can also freeze them. Just let them thaw in the fridge for a few hours before serving. This makes them perfect for planning parties or busy schedules. Plus, they taste just as delicious straight from the fridge, so you can enjoy them cold. Taking a few extra steps to store them properly ensures that every bite is just as tasty as the first one. No matter how you keep them, these treats are always ready to impress.
Presentation Ideas for Maximum Appeal
| Tip | Details |
|---|---|
| Mini Cupcake Liners | Makes them easy to serve and keeps them neat. |
| Decorative Plates | Arrange on a tiered stand for an elegant display. |
| Extra Toppings | Drizzle with chocolate or sprinkle crushed Oreos. |
Presentation is everything when it comes to desserts, and no-bake Oreo balls are no exception. To make them look extra special, use mini cupcake liners to serve them individually. You can also arrange them on a decorative plate or tiered stand for a stunning display. Adding a drizzle of melted chocolate or a sprinkle of crushed Oreos on top makes them even more eye-catching. If you’re serving them at a party, consider adding small labels or toothpick flags for a festive touch. These little details make a big difference, turning a simple treat into a showstopper. The best part? It doesn’t take much effort to make them look fancy. Whether you’re serving them casually at home or showcasing them at an event, no-bake Oreo balls always steal the show. Your guests won’t just love eating them—they’ll love how they look too!

Frequently Asked Questions (FAQs)
Yes, no-bake Oreo balls need to be refrigerated. The cream cheese in the recipe requires cold storage to stay fresh and safe. First, place the balls in an airtight container to keep them moist. Next, store them in the fridge for up to a week. If you’re making them ahead, you can even freeze them! Just thaw in the fridge before serving. Refrigeration also helps the chocolate coating stay firm and delicious. Keeping them cold ensures they hold their shape and taste amazing. Don’t skip this step—it’s the key to enjoying perfect Oreo balls every time!
Yes, you can use a blender if you don’t have a food processor. First, break the Oreos into smaller pieces to make blending easier. Then, pulse them in short bursts to create fine crumbs. If the crumbs stick, stop and gently shake the blender or stir with a spoon. It might take a little longer than a food processor, but it works just as well. Blending the Oreos this way ensures your no-bake Oreo balls turn out smooth and delicious. No matter your method, the end result will be the same—a treat everyone loves!
If your no-bake Oreo balls are falling apart, it’s likely due to the mixture being too dry. First, check that you’ve used enough cream cheese to bind the crumbs together. Next, mix the ingredients thoroughly until the dough feels smooth and sticky. Also, be sure to roll the balls firmly so they hold their shape. If you skip chilling them before dipping, they may crumble, so refrigerate them for at least 20 minutes. Following these steps will help your Oreo balls stay intact and look great. It’s all about finding the perfect balance for a firm and tasty treat!
Dipping no-bake Oreo balls can be fun and easy with a few tips! First, melt your chocolate until smooth and glossy. Next, use a fork or skewer to hold each ball as you dip it into the chocolate. Let the excess chocolate drip off before placing the ball on a parchment-lined tray. To avoid mess, work quickly and chill the balls beforehand to keep them firm. You can also add toppings like sprinkles or a drizzle of white chocolate for extra flair. These simple tricks make the dipping process smooth and enjoyable. Soon, you’ll have perfectly coated Oreo balls!
4 thoughts on “No-Bake Oreo Balls: Simple, Delicious, and Irresistible”