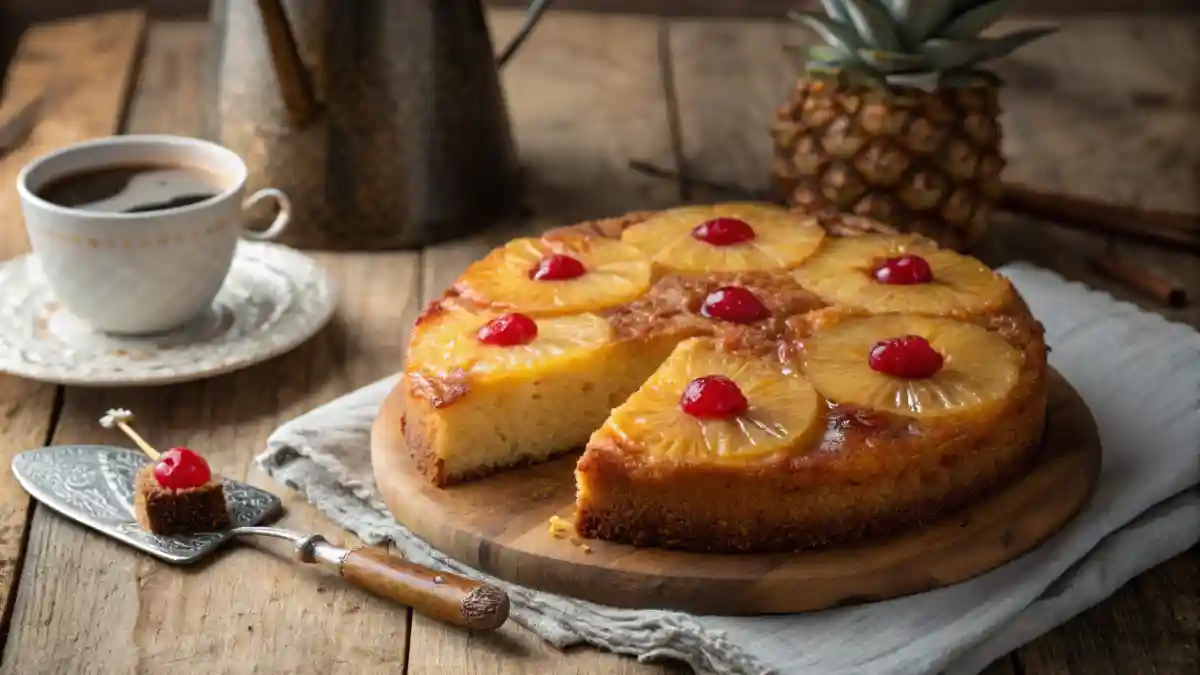
Pineapple Upside Down Cake is one of those desserts that instantly brings back warm, nostalgic memories—maybe from childhood bake sales or family gatherings where someone always showed up with this caramelized, golden delight. The best part? It’s ridiculously easy to make! You don’t need fancy skills or complicated ingredients—just a few pantry staples, a can of pineapple, and a little baking magic.
First, the rich, buttery brown sugar topping melts into the cake, creating a sweet and slightly tangy flavor that’s absolutely irresistible. Then, there’s the moist, fluffy texture that keeps you coming back for another slice. Also, this cake is surprisingly versatile. You can swap in different fruits, add a sprinkle of nuts, or even bake it in cupcake form for a fun twist!
Whether you’re a baking pro or just getting started, this recipe is a must-try. So grab your mixing bowl, preheat that oven, and let’s dive into a dessert that’s as fun to make as it is to eat. Keep reading for all the delicious details!
The History Behind Pineapple Upside Down Cake
How This Retro Dessert Became a Timeless Treat
Pineapple Upside Down Cake has been around for decades, and it’s not going anywhere! First, this dessert became popular in the early 1900s when home bakers started flipping their cakes after baking. The result? A golden, caramelized topping with juicy pineapple slices sitting perfectly on a soft, buttery cake. It was like magic! Then, in the 1920s, pineapple companies held recipe contests, making the cake even more famous. Soon, everyone wanted to try it! Also, this cake was easy to make, requiring simple pantry ingredients. Families loved that they could whip up a fancy-looking dessert without much effort. Today, it remains a classic, bringing comfort and nostalgia with every bite. Whether it’s baked for birthdays, holidays, or just because, this cake never disappoints. If you haven’t made one yet, you’re in for a treat. Get ready to bake up some history!
| Key Highlights | Details |
|---|---|
| Origins | Popular in the early 1900s when bakers started flipping cakes. |
| Rise in Popularity | Gained fame in the 1920s through pineapple company recipe contests. |
| Why People Love It | Simple ingredients, easy to make, nostalgic taste. |
| Perfect for | Birthdays, holidays, family gatherings. |
The Influence of Canned Pineapple on Its Popularity
Canned pineapple changed the baking game forever! Before it existed, fresh pineapple was expensive and hard to find. But once canned pineapple hit the shelves, everything changed. First, it became affordable, making Pineapple Upside Down Cake accessible to everyone. Then, the fruit’s perfectly round slices made the cake look picture-perfect without extra effort. Also, the natural juices in canned pineapple added moisture, making the cake even more delicious. No one had to peel, core, or slice a tough pineapple anymore—just open a can and bake! As a result, the cake soared in popularity, appearing at potlucks, Sunday dinners, and family celebrations everywhere. Even today, most recipes still use canned pineapple because it’s convenient and consistent. So, the next time you grab a can, remember—this simple ingredient helped turn a humble cake into a legendary dessert!
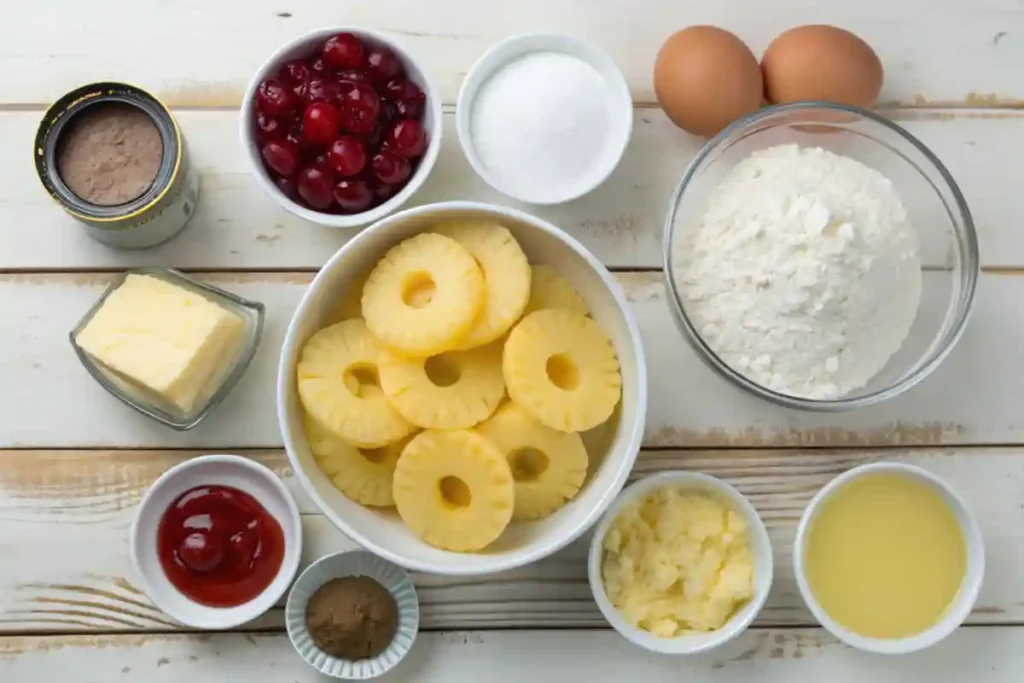
Essential Ingredients for a Perfect Pineapple Upside Down Cake
Choosing the Best Pineapple and Cherries
Not all pineapples are created equal! If you’re using fresh pineapple, pick one that’s golden, fragrant, and slightly soft when squeezed. This means it’s sweet and ripe! However, canned pineapple is the easiest choice. It comes in perfect rings and has a sweet, consistent flavor every time. Next, let’s talk cherries! Bright red maraschino cherries are the classic choice, adding a pop of color and sweetness. They also create that iconic look everyone loves. For a fun twist, try using fresh cherries or even frozen ones for a slightly tart contrast. Also, don’t forget to pat your fruit dry before adding it to the cake. This prevents excess moisture from making the cake soggy. Whether you go classic or get creative, picking the right pineapple and cherries will make your cake look and taste amazing. So, grab your favorite fruit and get ready to bake!
| Ingredient | Why It Matters |
|---|---|
| Fresh Pineapple | Sweet, juicy, and natural, but requires peeling. |
| Canned Pineapple | Convenient, consistent, and easy to use. |
| Maraschino Cherries | Adds color, sweetness, and traditional appeal. |
| Fresh/Frozen Cherries | A tart twist for a modern variation. |
The Role of Butter and Brown Sugar in Flavor Development
Butter and brown sugar are the secret to that rich, caramelized topping. First, butter melts in the pan, creating a luscious base for the fruit. Then, brown sugar mixes in, forming a sticky-sweet layer that soaks into the cake as it bakes. This combination gives Pineapple Upside Down Cake its signature deep, buttery flavor. Also, dark brown sugar adds extra richness, while light brown sugar creates a milder caramel taste. Either way, you can’t go wrong! Another tip? Make sure the butter and sugar fully melt before adding the fruit. This helps everything blend smoothly and prevents grainy texture. As the cake bakes, the sugar caramelizes, turning golden and glossy. When you flip the cake over, you get that irresistible, gooey topping. It’s the best part! So, don’t skimp on the butter and brown sugar—your cake will thank you!
Step-by-Step Guide to Making Pineapple Upside Down Cake
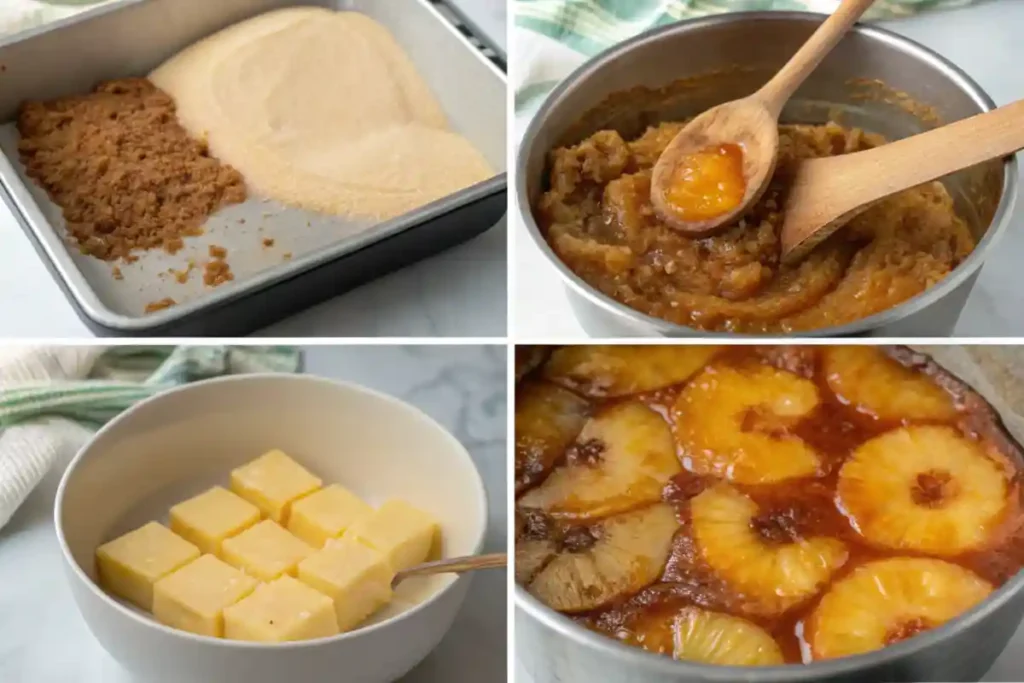
Preparing the Caramelized Topping for a Rich Finish
The magic of Pineapple Upside Down Cake starts with the topping! First, melt butter in your cake pan or skillet, making sure it coats the entire bottom evenly. Then, sprinkle brown sugar over the butter, letting it dissolve slightly for a smoother finish. Also, you can give the pan a gentle swirl to mix everything together. Next, carefully arrange your pineapple slices, making sure they don’t overlap. Place a cherry in the center of each ring for that classic, eye-catching look. For extra flavor, you can drizzle a little pineapple juice over the top. Then, let the mixture sit while you prepare the cake batter. This lets the flavors blend before baking. Once the cake is done, flipping it over reveals the beautifully caramelized fruit topping. It’s always a satisfying moment! So, take your time with this step—it’s what makes the cake shine!
| Step | Action |
|---|---|
| Melt Butter | Coat the bottom of the pan evenly. |
| Add Brown Sugar | Sprinkle and let it dissolve slightly. |
| Arrange Pineapples | Lay them flat without overlapping. |
| Place Cherries | Add to the center of each ring. |
| Drizzle Pineapple Juice | Enhances flavor before baking. |
Baking Tips to Ensure a Moist and Fluffy Cake
A great Pineapple Upside Down Cake is soft, fluffy, and never dry. First, use room-temperature ingredients for a smooth batter. Then, mix just until combined—overmixing can make the cake dense. Also, a good rule of thumb is to bake at a moderate temperature, around 350°F. This ensures even cooking without burning the sugar topping. If the edges brown too quickly, loosely cover them with foil. Next, check for doneness by inserting a toothpick into the center. If it comes out clean, your cake is ready! Let the cake rest for five minutes before flipping it. This helps the caramelized topping set. But don’t wait too long, or it might stick! Finally, use a sharp knife to loosen the edges before turning it out onto a plate. When done right, you’ll have a perfectly moist cake with a stunning golden top!
Variations and Creative Twists on Pineapple Upside Down Cake
Mini Versions and Cupcake Alternatives
Why stick to one big cake when you can make cute, individual servings? Mini Pineapple Upside Down Cakes are just as delicious, but even more fun! First, use a muffin tin instead of a cake pan. Then, follow the same layering process—melted butter, brown sugar, pineapple, and cherries. Also, use pineapple chunks or smaller rings to fit into the cups. Next, pour the batter over the fruit and bake until golden brown. The best part? Each mini cake has its own caramelized topping, making them perfect for parties or portion control. In addition, you can get creative by using different fruit combinations. Try peaches, apples, or even mango for a tropical twist! These mini cakes are easy to grab, serve, and enjoy. Plus, they bake faster than a full cake. So, if you love Pineapple Upside Down Cake but want a smaller version, this is the way to go!
| Mini Cake Variation | Why It Works |
|---|---|
| Muffin Tin Version | Perfect for portion control and serving at parties. |
| Pineapple Chunks Instead of Rings | Fits better into muffin cups and provides smaller bites. |
| Alternative Fruits (Peach, Apple, Mango) | Adds a fun twist to the classic recipe. |
| Shorter Baking Time | Bakes faster than a full-size cake. |
Adding Nuts, Spices, or Coconut for Extra Flavor
Want to take your Pineapple Upside Down Cake to the next level? Add a little something extra! First, chopped pecans or walnuts bring a nice crunch to the caramelized topping. Sprinkle them in before adding the fruit for a nutty twist. Then, warm spices like cinnamon, nutmeg, or ginger give the cake extra depth. Just a pinch can make a big difference! Also, shredded coconut adds a tropical flavor that pairs perfectly with pineapple. You can mix it into the batter or sprinkle it over the top before serving. In addition, a splash of rum or coconut extract in the batter enhances the tropical vibe. The possibilities are endless! Whether you like a crunchy, spiced, or coconut-infused cake, there’s a way to make it your own. So, don’t be afraid to experiment—your perfect version of this classic is waiting to be made!
How to Serve and Store Pineapple Upside Down Cake
Best Ways to Enjoy It Warm or Chilled
One of the best things about Pineapple Upside Down Cake is how versatile it is! First, it tastes amazing warm, fresh from the oven. The caramelized topping is gooey, and the cake is soft and moist. Then, if you love contrast, try serving it with a scoop of vanilla ice cream. The cold ice cream melts into the warm cake, creating the perfect bite. Also, you can chill the cake and serve it cold. This makes the flavors more intense and the texture firmer. In addition, a dollop of whipped cream or a drizzle of caramel sauce can add even more decadence. However you enjoy it, this cake is always a winner. Whether you serve it at a party or enjoy a slice with coffee, it’s the kind of dessert that never gets old. So, warm or chilled—how will you eat yours?
Storage Tips to Keep It Fresh and Delicious
Want to keep your Pineapple Upside Down Cake tasting fresh? First, if you plan to eat it within a day or two, store it at room temperature. Cover it loosely with plastic wrap or foil to keep it from drying out. Then, for longer storage, place the cake in an airtight container and refrigerate it for up to five days. Also, if you want to save it for later, freeze individual slices! Wrap each piece tightly in plastic wrap and then in foil before freezing. This keeps the moisture locked in. When you’re ready to eat, just thaw it at room temperature or warm it in the microwave for a few seconds. With these simple steps, you’ll always have a fresh and delicious cake waiting for you!
| Storage Method | Timeframe | Best Practice |
|---|---|---|
| Room Temperature | 1-2 Days | Cover loosely with foil or plastic wrap. |
| Refrigerated | Up to 5 Days | Store in an airtight container. |
| Frozen | Up to 3 Months | Wrap slices in plastic wrap and foil before freezing. |
| Thawing Method | Quick: Microwave | Slow: Let sit at room temp. |
Frequently Asked Questions (FAQs)
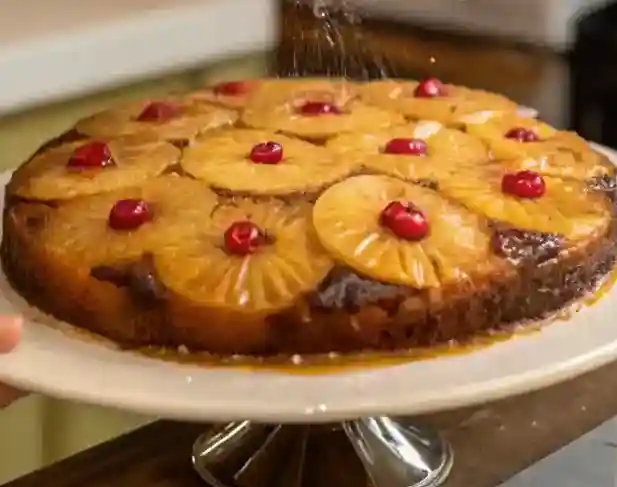
You should flip a Pineapple Upside Down Cake while it’s still warm. First, let it rest for about five minutes after baking. Then, place a plate over the pan and carefully turn it upside down. The warm caramelized topping will slide out easily, keeping the fruit perfectly in place. If you wait too long, the sugar will harden, making it harder to flip. Also, running a knife around the edges helps loosen the cake. If some fruit sticks, just scoop it back on top. It’s all about timing, so don’t let it cool completely before flipping!
You can use a yellow or butter cake mix for Pineapple Upside Down Cake. Both have a rich, buttery flavor that pairs perfectly with caramelized pineapple. First, follow the box instructions, but swap the water for pineapple juice to boost the flavor. Then, mix everything gently to keep the cake light and fluffy. Also, a vanilla or spice cake mix works great for a fun twist. If you love baking from scratch, a homemade butter cake is always a winner. No matter which mix you use, the key is balancing sweetness with the tangy pineapple topping.
Yes! Using pineapple juice instead of water makes Pineapple Upside Down Cake extra flavorful. First, check your cake mix instructions and swap the water with an equal amount of pineapple juice. Then, mix it in gently to keep the batter light. The juice adds natural sweetness and enhances the tropical taste. Also, it makes the cake extra moist, which is always a plus! If you want an even richer flavor, try combining half pineapple juice and half milk. This trick works well with yellow, butter, and vanilla cake mixes. Give it a try—it’s an easy upgrade!
Flipping a Pineapple Upside Down Cake is all about timing and confidence! First, let the cake rest for about five minutes after baking. Then, place a serving plate over the pan and hold them tightly together. Next, flip it in one smooth motion—don’t hesitate! Also, let gravity do the work and lift the pan slowly. If some fruit sticks, just nudge it back into place. Another tip? Running a knife around the edges before flipping helps loosen the cake. Finally, if you’re nervous, practice with an empty pan first. The key is to flip quickly but carefully!
Why Pineapple Upside Down Cake Will Always Be a Crowd-Pleaser
Pineapple Upside Down Cake is the kind of dessert that never goes out of style. First, it’s easy to make, even for beginners. Then, it looks stunning with its golden caramelized top and bright pineapple rings. Also, every bite is soft, buttery, and packed with tropical flavor. In addition, this cake is perfect for any occasion—holidays, birthdays, or just because. You can stick to the classic recipe or add fun twists with nuts, spices, or different fruits. Plus, the moment you flip it over is always exciting! If you haven’t tried making one yet, now’s the time. It’s simple, delicious, and guaranteed to impress. Whether served warm with ice cream or chilled for a firmer bite, this cake always hits the spot. So, grab your ingredients, preheat your oven, and let’s keep this timeless treat alive. Pineapple Upside Down Cake is here to stay! 🍍🍰
Print
Pineapple Upside Down Cake: A Classic Dessert Favorite
- Total Time: 55 minutes
- Yield: 1 (9-inch) cake 1x
Description
This Pineapple Upside Down Cake is a timeless, buttery classic with a caramelized pineapple topping, juicy cherries, and a soft, moist cake. Perfect for any occasion, this easy-to-make cake delivers a sweet, slightly tangy flavor that melts in your mouth. Whether you’re making it for a holiday, a birthday, or a weekend treat, this retro dessert never goes out of style! Serve it warm with ice cream or enjoy it chilled for a firmer bite.
Ingredients
For the Caramelized Topping:
- ¼ cup unsalted butter (melted)
- ¾ cup packed brown sugar
- 1 (20 oz) can pineapple slices (drained, juice reserved)
- 10–12 maraschino cherries (optional, for decoration)
For the Cake Batter:
- 1 ½ cups all-purpose flour
- 1 cup granulated sugar
- ½ cup unsalted butter (softened)
- 2 large eggs
- ½ cup pineapple juice (from the can)
- 1 teaspoon vanilla extract
- 1 ½ teaspoons baking powder
- ½ teaspoon baking soda
- ¼ teaspoon salt
- ½ cup whole milk
Instructions
Step 1: Prepare the Topping
- Preheat oven to 350°F (175°C). Grease a 9-inch round cake pan or cast iron skillet.
- Pour melted butter into the pan and spread evenly.
- Sprinkle brown sugar over the butter.
- Arrange pineapple slices in a single layer over the sugar.
- Place a maraschino cherry in the center of each pineapple slice.
Step 2: Make the Cake Batter
- In a large bowl, cream butter and sugar until light and fluffy.
- Add eggs one at a time, beating well after each addition.
- Mix in vanilla extract and pineapple juice.
- In another bowl, whisk together flour, baking powder, baking soda, and salt.
- Alternately add the dry ingredients and milk to the wet mixture, mixing until just combined.
Step 3: Bake the Cake
- Pour the batter over the pineapple layer, spreading evenly.
- Bake for 35-40 minutes, or until a toothpick inserted in the center comes out clean.
- Let cool for 5 minutes before flipping onto a serving plate.
Step 4: Flip and Serve
- Place a serving plate over the pan, hold firmly, and flip in one smooth motion.
- Let cool for 10 minutes before slicing. Serve warm or at room temperature.
Notes
- Make It Extra Caramelized: Bake the topping in the pan for 5 minutes before adding the batter.
- Gluten-Free Version: Use a 1:1 gluten-free flour blend.
- Dairy-Free Alternative: Swap butter for vegan butter and milk for almond milk.
- Storage:
- Room Temperature: 1-2 days (loosely covered).
- Refrigerate: Up to 5 days (airtight container).
- Freeze: Wrap slices tightly and freeze for up to 3 months.
- Prep Time: 15 minutes
- Cook Time: 40 minutes
- Cuisine: American / Retro Classic
Nutrition
- Calories: ~320 kcal
- Fat: ~12g
- Carbohydrates: ~50g
- Fiber: ~1g
- Protein: ~3g
1 thought on “Pineapple Upside Down Cake: A Classic Dessert Favorite”