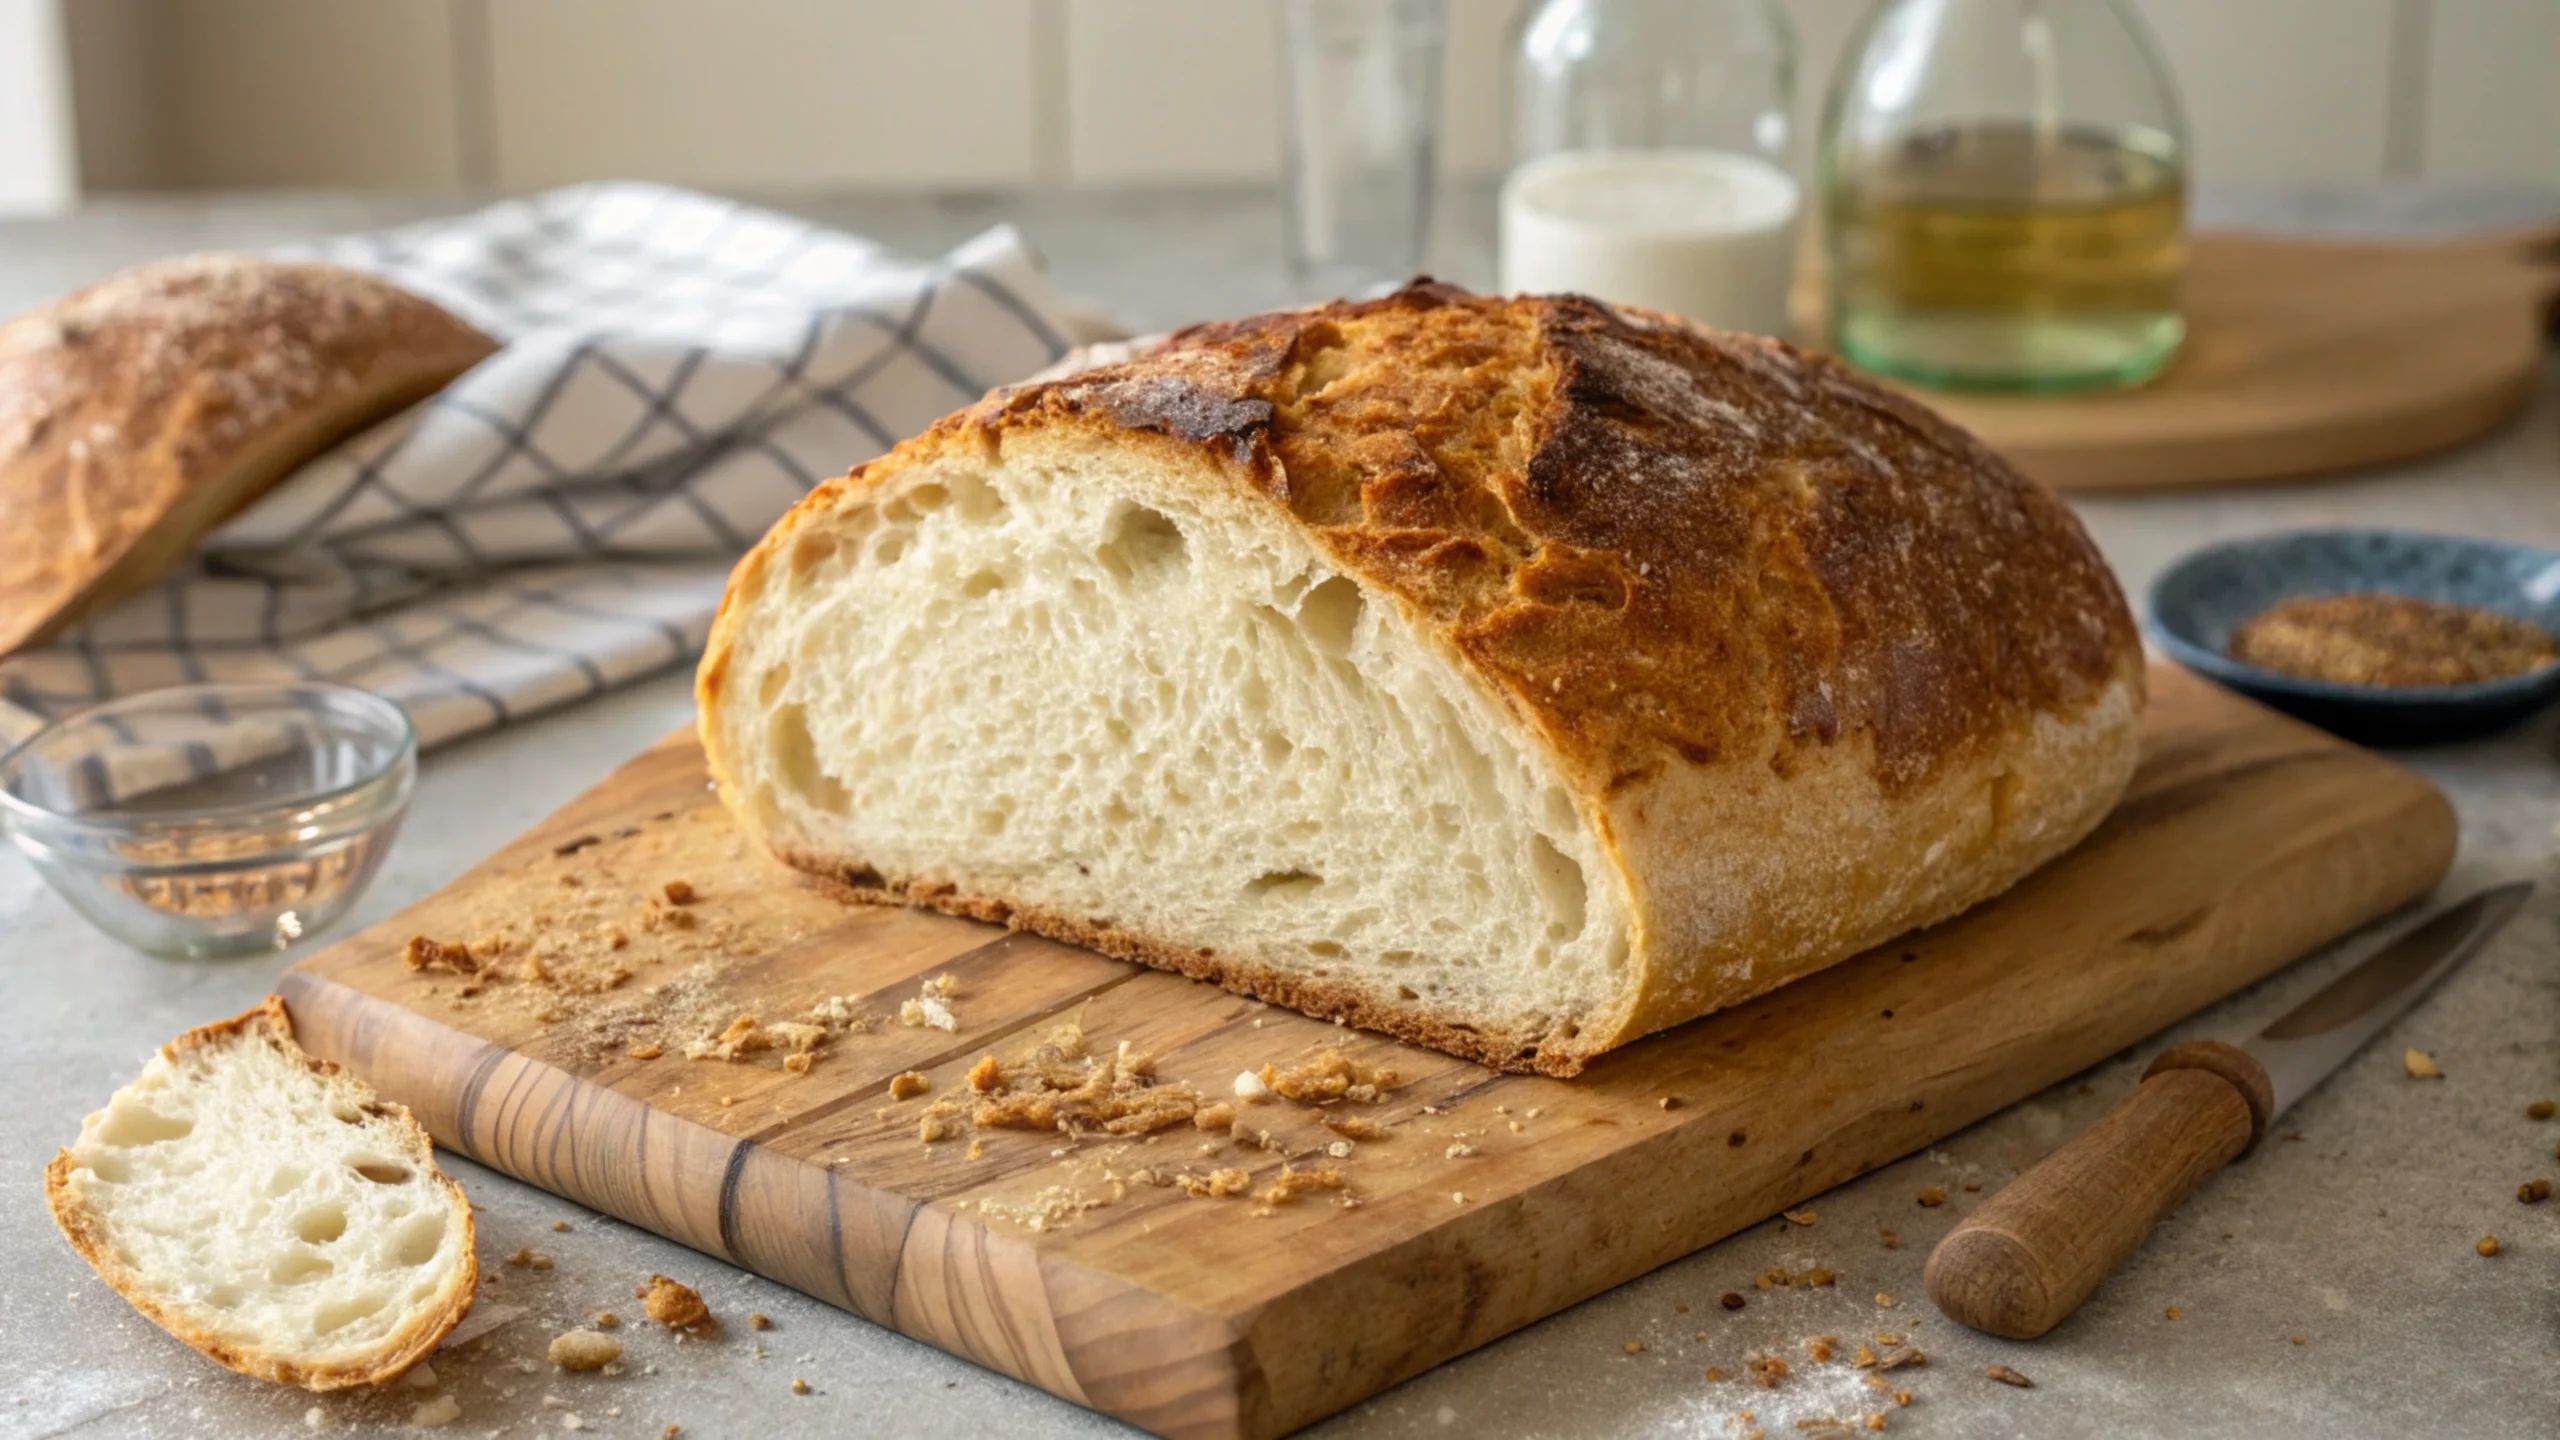
Sourdough bread recipe—just hearing those words can make your mouth water, right? But if you’ve always thought making sourdough was too complicated or time-consuming, you’re in for a treat! Imagine the smell of freshly baked bread filling your kitchen, the crackle of that golden crust, and the soft, tangy goodness waiting inside. It’s easier than you think, and yes, you can absolutely do it at home—even if you’re a total beginner. Plus, homemade sourdough isn’t just delicious; it’s healthier too! Thanks to its natural fermentation, it’s easier to digest and packs a flavorful punch without any artificial additives.
In addition, sourdough is incredibly versatile—perfect for sandwiches, toast, or just enjoying with a little butter. Who wouldn’t want that? You’ll also love how rewarding it feels to make something from scratch. It’s like a fun little challenge that pays off in the most delicious way! Ready to impress your friends or just treat yourself to some homemade love? Keep reading, and I’ll show you every step. Let’s get baking!
Why Sourdough Bread is Worth the Effort
Unique Health Benefits of Sourdough
Sourdough isn’t just delicious—it’s also good for you! Thanks to its natural fermentation process, sourdough bread is easier to digest than regular bread. The friendly bacteria in the sourdough starter help break down gluten, making it gentler on your stomach. Also, it has a lower glycemic index, which means it won’t spike your blood sugar as much. That’s a win for your energy levels! In addition, sourdough is rich in vitamins and minerals, like B vitamins, iron, and magnesium. These nutrients help keep you energized and feeling great. And here’s the best part: because it’s naturally preserved by the fermentation process, it stays fresh longer without artificial additives. So, when you’re making your own sourdough bread recipe, you’re not just getting amazing flavor—you’re also getting health benefits you won’t find in store-bought bread. Who knew something so tasty could be so good for you?
| Health Benefits of Sourdough | Why It’s Great |
|---|---|
| Easier Digestion | Breaks down gluten naturally |
| Lower Glycemic Index | Maintains steady blood sugar |
| Rich in Vitamins and Minerals | B vitamins, iron, magnesium |
| Natural Preservation | Stays fresh longer without additives |
The Distinctive Flavor of Homemade Sourdough
There’s nothing quite like the flavor of homemade sourdough bread. It’s tangy, rich, and has this depth that no store-bought loaf can match. That unique taste comes from the wild yeast and bacteria in the sourdough starter, which create complex flavors as they ferment. Plus, the longer fermentation process enhances the taste, giving it that signature tangy kick. Also, the crust is perfectly crispy, while the inside stays soft and chewy. It’s a texture you just can’t get from regular bread. In addition, making your own sourdough bread recipe lets you control the flavor profile. You can make it more or less tangy, depending on how long you let it ferment. Imagine pulling a warm loaf out of your oven, hearing that crunch as you slice through the golden crust, and tasting that irresistible, slightly sour flavor. It’s pure bliss, and you made it all by yourself!
Essential Ingredients for Sourdough Bread
Choosing the Right Flour for Sourdough
The secret to a perfect sourdough bread recipe starts with choosing the right flour. Not all flours are created equal! For the best results, go for high-quality, unbleached flour. It’s packed with natural nutrients and has the right amount of protein for a good rise. Bread flour is a fantastic choice because of its high gluten content, giving your sourdough that chewy texture we all love. But don’t be afraid to experiment! You can mix in whole wheat flour for a nuttier flavor or even rye flour for a denser, richer loaf. In addition, organic flours are great because they’re less processed and still have all the natural goodness. Also, they help your sourdough starter thrive, thanks to the wild yeast and bacteria present in them. So, choosing the right flour isn’t just about taste—it’s about helping your sourdough grow strong and delicious!
| Type of Flour | Flavor and Texture |
|---|---|
| Bread Flour | Chewy texture, good rise |
| Whole Wheat Flour | Nutty flavor, denser loaf |
| Rye Flour | Rich, earthy flavor |
| Organic Unbleached Flour | More nutrients, helps starter thrive |
Understanding the Role of the Sourdough Starter
The sourdough starter is the heart and soul of any sourdough bread recipe. It’s what makes the magic happen! A mixture of flour and water, it captures wild yeast and bacteria from the air, giving your bread its unique flavor and rise. Unlike commercial yeast, a sourdough starter ferments naturally, producing that signature tangy taste. In addition, it’s what makes sourdough easier to digest, as it breaks down gluten and increases nutrient availability. Also, your starter is a living thing, and it needs a little love and care. Feed it regularly with fresh flour and water, and watch it bubble with life. It’s like having a pet—but way tastier! The best part? Once you get it going, you can use it again and again, making every loaf special. Your homemade sourdough will have a flavor all its own, thanks to your unique, lively starter!
| Sourdough Starter Tips | Why It’s Important |
|---|---|
| Captures Wild Yeast | Gives unique flavor and rise |
| Ferments Naturally | Creates tangy taste, easier digestion |
| Needs Regular Feeding | Keeps the starter alive and active |
| Reusable and Versatile | Can be used repeatedly for many loaves |
Step-by-Step Sourdough Bread Recipe
Mixing and Kneading the Dough
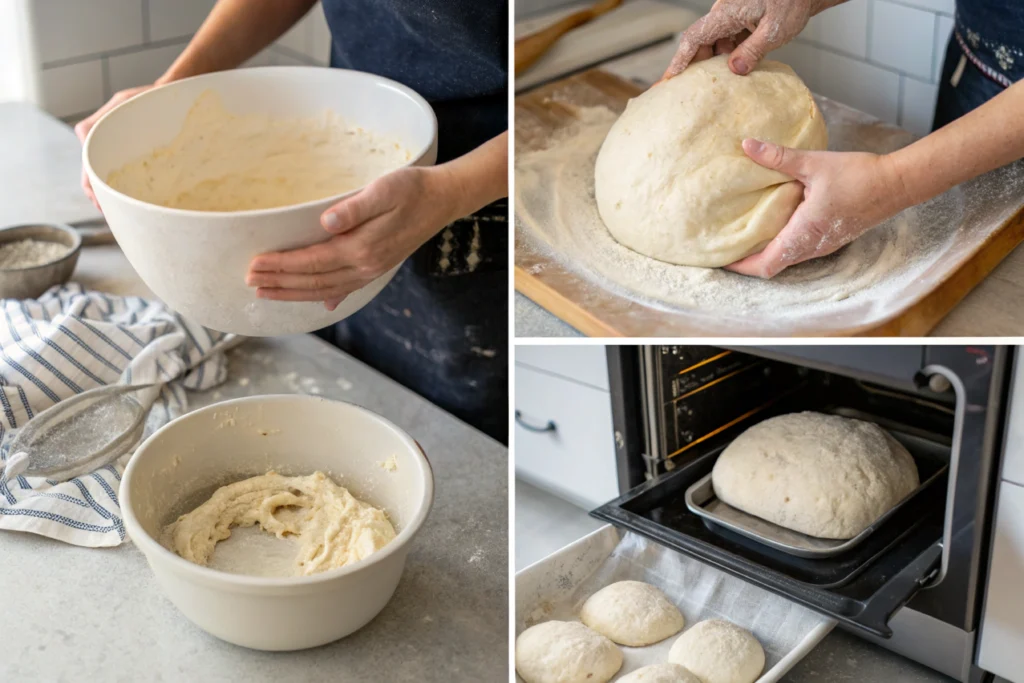
Mixing and kneading are the first big steps in making a perfect sourdough bread recipe. Start by combining your sourdough starter, water, and flour. Mix it until it forms a rough, sticky dough. Don’t worry—it’s supposed to be sticky! Next, let the dough rest for about 30 minutes. This gives the flour time to absorb the water, making it easier to knead. Once rested, it’s time to get your hands dirty! Knead the dough by stretching and folding it over itself. This helps build gluten, giving your bread that wonderful chewy texture. Also, it strengthens the dough, so it holds its shape while rising. In addition, the more you knead, the smoother and more elastic it becomes. It’s like magic! Just remember, patience is key. Take your time, enjoy the process, and you’ll end up with a beautiful, well-developed dough.
Proper Fermentation and Proofing Techniques
Fermentation and proofing are where the real magic happens in a sourdough bread recipe. After kneading, let your dough rest in a warm spot. This is the bulk fermentation stage, where the sourdough starter works its magic, making the dough rise. It’s also when those complex flavors develop. In addition, the wild yeast and bacteria create air pockets, giving your bread that lovely open crumb. Next, shape your dough and let it go through a second rise, called proofing. This is where the dough becomes airy and light. Also, the longer you proof, the more tangy your bread will be, so feel free to experiment! Just don’t overdo it, or your dough might collapse. Proper fermentation and proofing are all about timing and patience. But trust me, once you nail this step, you’ll be rewarded with a loaf that’s beautifully risen, flavorful, and absolutely irresistible!
| Fermentation and Proofing Tips | Why It’s Important |
|---|---|
| Bulk Fermentation (Warm Spot) | Develops flavor and dough structure |
| Creates Air Pockets | Gives bread a light, open crumb |
| Shaping and Second Proofing | Adds volume, makes dough airy and light |
| Longer Proof = More Tangy Flavor | Adjusts sourness to your taste |
| Timing and Patience | Ensures a perfectly risen and flavorful loaf |
Baking and Storing Your Sourdough Bread
Perfect Baking Temperatures and Times
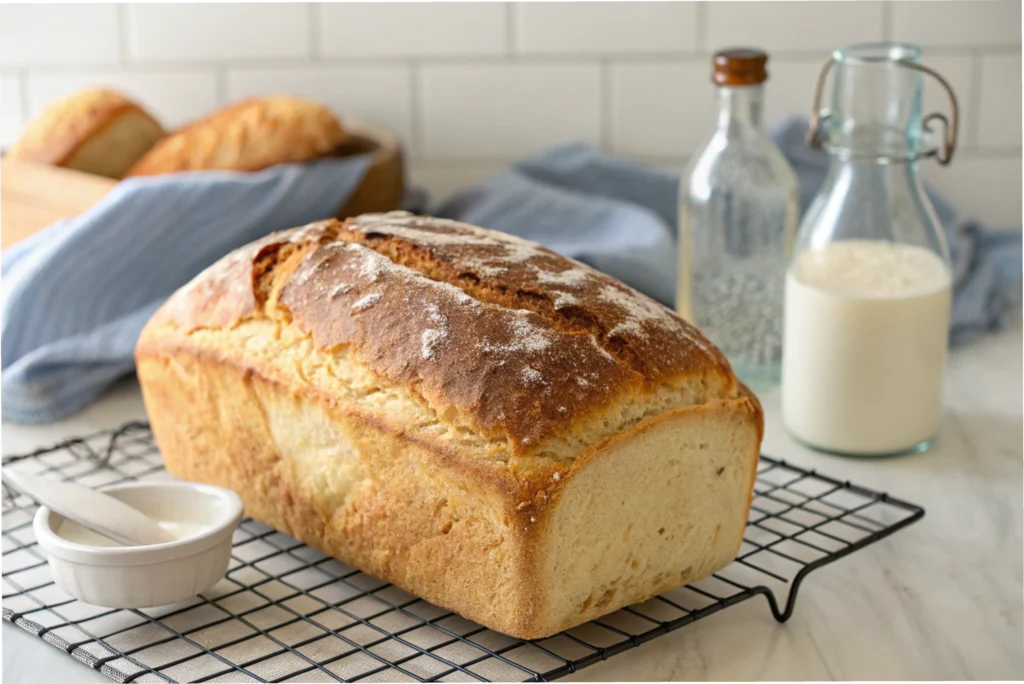
Getting the perfect crust and crumb in your sourdough bread recipe comes down to baking temperatures and times. Preheat your oven to the highest setting—usually around 475°F (245°C). A hot oven is key to getting that signature crispy crust. Also, using a Dutch oven traps steam, giving your bread an amazing rise and a glossy, crackly crust. Place your dough in the preheated Dutch oven, cover it, and bake for about 20 minutes. Then, remove the lid to let the crust brown beautifully. In addition, lowering the temperature slightly after the first 20 minutes helps cook the inside without burning the crust. You’ll know it’s ready when it sounds hollow when tapped on the bottom. The smell will drive you crazy! Let it cool completely before slicing—if you can wait. This patience gives the crumb time to set, ensuring perfect slices every time.
How to Store and Keep Sourdough Fresh
After all that hard work on your sourdough bread recipe, you’ll want to keep it fresh as long as possible. The good news? Sourdough stays fresh longer than regular bread because of its natural acidity. First, let it cool completely before storing it. This prevents moisture buildup, which can make the crust soggy. Next, store it at room temperature in a paper bag or wrapped in a kitchen towel. This keeps the crust crispy while protecting the inside. In addition, avoid storing it in plastic, as this makes the bread chewy and damp. Also, if you won’t eat it within a few days, slice and freeze it. Just pop a slice in the toaster, and it’ll taste freshly baked! There’s nothing like having homemade sourdough ready whenever you crave it. Storing it the right way means you get to enjoy every delicious crumb!
| Storing Tips | Why It’s Important |
|---|---|
| Cool Completely Before Storing | Prevents soggy crust |
| Store at Room Temperature | Maintains crust texture |
| Use Paper Bag or Kitchen Towel | Keeps crust crispy, prevents drying out |
| Avoid Plastic Bags | Prevents chewy, damp texture |
| Freeze Sliced for Longer Storage | Convenient and keeps bread fresh |
Sourdough Bread Variations and Tips
Adding Seeds, Nuts, and Flavor Enhancers
Once you’ve mastered the basic sourdough bread recipe, it’s time to have some fun! Adding seeds, nuts, and other flavor enhancers can take your bread to the next level. You can toss in sunflower seeds, pumpkin seeds, or even sesame seeds for a crunchy texture. In addition, nuts like walnuts or pecans add a delightful nutty flavor and crunch. Also, consider adding dried fruits like cranberries or raisins for a touch of sweetness. Mix-ins aren’t just tasty—they make your bread look beautiful, too! Just be sure to fold them in gently during the final stretch and fold phase. This keeps the dough airy and light. The possibilities are endless, and the best part is that you get to experiment and find your favorite combination. Who knew making sourdough could be this creative and fun?
| Flavor Enhancer | Taste and Texture Benefit |
|---|---|
| Sunflower and Pumpkin Seeds | Adds crunch and a nutty flavor |
| Sesame Seeds | Gives a toasty, aromatic taste |
| Walnuts and Pecans | Adds crunch and richness |
| Dried Fruits (Cranberries, Raisins) | Sweetness and chewiness |
| Herbs and Spices | Enhances aroma and adds unique flavors |
Troubleshooting Common Sourdough Issues
Even with the best sourdough bread recipe, things don’t always go as planned. If your dough is too sticky, try adding a little more flour, but don’t overdo it—sourdough is meant to be sticky! Also, if your bread doesn’t rise enough, check your sourdough starter. It might need more feeding to get active and bubbly again. In addition, if your crust is too hard, try baking at a slightly lower temperature or covering it sooner. And if the crumb is too dense, you might need to let it ferment or proof a bit longer. Remember, practice makes perfect! Every loaf teaches you something new. The beauty of sourdough is that it’s a living thing, so no two loaves are exactly the same. Embrace the process, learn from any mishaps, and enjoy every delicious bite!
| Common Issue | Solution |
|---|---|
| Dough Too Sticky | Add a little more flour, adjust hydration |
| Flat or Dense Loaf | Check starter activity, proof longer |
| Hard Crust | Lower baking temperature, cover earlier |
| Dense Crumb | Increase fermentation or proofing time |
| Sourdough Too Sour | Shorten fermentation time |
Frequently Asked Questions (FAQs)
The secret to making good sourdough bread is patience and practice. First, make sure your sourdough starter is active and bubbly. This is the powerhouse behind your bread’s rise and flavor. Next, don’t rush the fermentation process. Letting the dough rest and rise slowly develops that delicious, tangy taste. Also, mastering the stretch and fold technique helps build gluten, giving your bread that chewy texture. In addition, using high-quality flour makes a big difference. Finally, practice makes perfect! Every loaf teaches you something new. So keep experimenting, and soon you’ll bake amazing sourdough every time!
Yes, sourdough bread is generally better for you than regular bread. Thanks to its natural fermentation process, it’s easier to digest and contains more nutrients. The wild yeast and bacteria break down gluten, making it gentler on your stomach. Also, sourdough has a lower glycemic index, which means it won’t spike your blood sugar as much. In addition, it’s rich in vitamins and minerals, like B vitamins, iron, and magnesium. Plus, it doesn’t contain artificial additives or preservatives. So, when you enjoy a slice of homemade sourdough bread, you’re choosing a healthier option!
The biggest mistake you can make with your sourdough starter is forgetting to feed it. It’s a living thing and needs regular feeding to stay active. If you don’t feed it, it can become weak or even die. Also, using the wrong type of flour or contaminated water can affect its health. In addition, storing it in too hot or too cold of a place can cause problems. A too-warm spot makes it overly sour, while a cold spot can slow its activity. Keep it happy with regular feeding, and it will reward you with amazing bread!
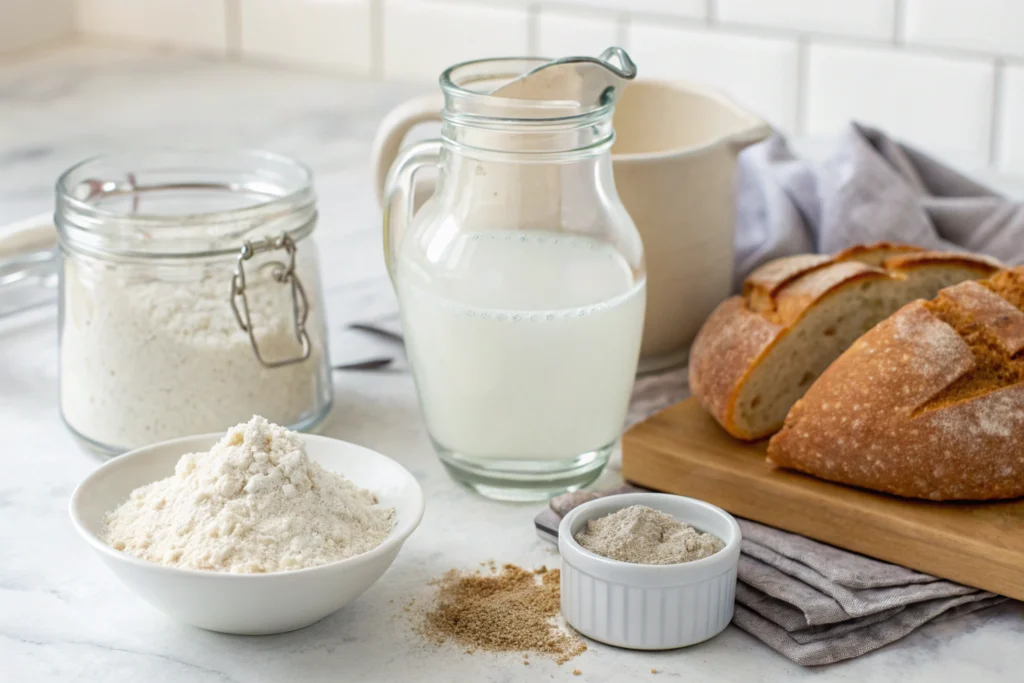
For a basic sourdough bread recipe, you only need four simple ingredients: sourdough starter, flour, water, and salt. That’s it! The sourdough starter provides the natural yeast and bacteria that make the bread rise and give it that tangy flavor. Next, use high-quality flour, like bread flour or a mix of whole wheat for added flavor. Also, filtered water works best, as chlorine in tap water can harm the starter. Finally, a pinch of salt enhances the flavor. These simple ingredients come together to create delicious, homemade sourdough bread with a crispy crust and chewy interior!
Final Thoughts on Mastering Sourdough Bread
Mastering a sourdough bread recipe is like learning a fun new skill. It takes patience, practice, and a bit of trial and error. But once you get the hang of it, the rewards are amazing! There’s nothing like the smell of freshly baked sourdough filling your kitchen. Plus, you get that deliciously tangy flavor and crispy crust you just can’t find in store-bought bread. Also, it’s healthier and more natural. In addition, the satisfaction of making something from scratch is unbeatable. So, don’t be afraid to experiment and have fun with it. Each loaf is a new adventure. Whether you’re a beginner or a seasoned baker, there’s always something exciting to discover. So, grab your starter, roll up your sleeves, and start baking! Your kitchen will smell incredible, and your taste buds will thank you. You’ve got this—happy baking!
Print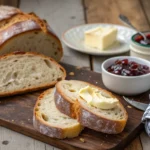
Sourdough Bread Recipe: Easy Steps for Perfect Homemade Loaf
- Total Time: 10-14 hours (including resting and fermentation)
- Yield: 1 large loaf (about 10–12 slices) 1x
Description
This Easy Sourdough Bread recipe is perfect for beginners and seasoned bakers alike! With just four simple ingredients—sourdough starter, flour, water, and salt—you can create a beautifully crusty, golden loaf that’s tangy, chewy, and absolutely delicious. The natural fermentation gives it a rich flavor, while the minimal kneading makes it surprisingly easy to prepare. Whether you’re craving toast, sandwiches, or just a warm slice with butter, this homemade sourdough bread is the ultimate comfort food. No fancy equipment needed—just patience and love!
Ingredients
- 100g active sourdough starter (fed and bubbly)
- 350g water (room temperature)
- 500g bread flour (or a mix of all-purpose and whole wheat)
- 10g salt
Instructions
Step 1: Feed and Activate the Sourdough Starter
- Feed the Starter: Feed your sourdough starter about 6-12 hours before baking. It should be active, bubbly, and doubled in size.
- Check Readiness: Perform the “float test” by dropping a small spoonful of starter into water. If it floats, it’s ready to use.
Step 2: Mix the Dough
- Combine Ingredients: In a large bowl, mix 100g active sourdough starter and 350g water until combined.
- Add Flour and Salt: Gradually add 500g bread flour and 10g salt. Mix until no dry bits remain. The dough will be sticky—that’s normal!
Step 3: Autolyse and Rest
- Rest (Autolyse): Cover the bowl and let the dough rest for 30 minutes. This helps the flour absorb the water and makes the dough easier to handle.
Step 4: Stretch and Fold Technique
- First Stretch and Fold: Wet your hands to prevent sticking. Gently stretch one side of the dough and fold it over itself. Repeat on all four sides.
- Repeat Every 30 Minutes: Continue the stretch and fold process 3-4 times, allowing the dough to rest for 30 minutes between each session. This helps build gluten and structure.
Step 5: Bulk Fermentation
- Ferment: Cover the bowl and let the dough rise at room temperature for 4-6 hours until it’s doubled in size and looks bubbly.
- Optional Cold Fermentation: For more flavor, place the dough in the refrigerator overnight (8-12 hours).
Step 6: Shape the Dough
- Shape the Dough: Turn the dough onto a floured surface. Gently shape it into a round or oval loaf by folding the edges toward the center.
- Tighten the Shape: Use a bench scraper to tighten the shape by pulling the dough towards you.
Step 7: Final Proof
- Prepare the Proofing Basket: Dust a proofing basket (banneton) or a bowl lined with a floured towel with flour.
- Proof the Dough: Place the dough seam-side up into the basket. Cover and let it rest for 1-2 hours at room temperature, or refrigerate for a slower rise.
Step 8: Preheat the Oven and Dutch Oven
- Preheat: Preheat your oven to 475°F (245°C) with a Dutch oven inside. The high heat creates steam for a perfect crust.
Step 9: Score and Bake
- Score the Dough: Turn the dough onto parchment paper. Using a sharp knife or a lame, score the top to allow for expansion.
- Bake: Carefully transfer the dough into the hot Dutch oven. Cover with the lid and bake for 20 minutes.
- Uncover and Finish Baking: Remove the lid and bake for an additional 20-25 minutes until golden brown.
Step 10: Cool and Enjoy!
- Cool Completely: Let the bread cool on a wire rack for at least 1 hour before slicing. This helps set the crumb.
- Serve and Enjoy: Slice and serve with butter, jam, or your favorite toppings. Enjoy the tangy, chewy goodness of homemade sourdough bread!
Notes
Storage Tips:
- Room Temperature: Store in a paper bag or wrapped in a kitchen towel for up to 3 days to keep the crust crispy.
- Freezing: Slice and freeze for up to 2 months. Toast slices directly from frozen for a fresh taste.
Tips for Success:
- Active Starter: Make sure your sourdough starter is active and bubbly for the best rise and flavor.
- Hydration Level: This recipe has a 70% hydration level for a slightly sticky but manageable dough.
- Scoring Techniques: Get creative with your scoring patterns—it not only looks beautiful but also helps the bread expand during baking.
Flavor Variations:
- Whole Wheat Sourdough: Replace up to 30% of the bread flour with whole wheat flour for a nuttier flavor.
- Seeded Sourdough: Mix in sunflower seeds, pumpkin seeds, or sesame seeds for added crunch and flavor.
- Herb Sourdough: Add fresh rosemary, thyme, or garlic powder for a fragrant, savory loaf.
- Prep Time: 30 minutes (active time)
- Cook Time: 45 minutes
- Cuisine: Artisan / Sourdough
Nutrition
- Calories: ~180 kcal
- Sodium: ~200 mg
- Fat: ~1g
- Carbohydrates: ~35g
- Fiber: ~2g
- Protein: ~6g